|
Author
|
Topic: MY NEXT LONG PLAY UNIT
|
Chip Gelmini
Phenomenal Film Handler

Posts: 1733
From: Brooksville, FL
Registered: Jun 2003
|
 posted November 01, 2009 12:49 PM


ATTENTION
Over the past several days, I have been adding to this post. If you are seeing this for the very first time, plan to spend a few minutes and do A LOT of reading......if you have already seen all of this and are returning for another look, feel free to jump around by using the page up/down buttons.....
BR 2000 PT16
I am pleased to announce I am now building my latest long play system for super 8 sound. Details of testing to come in the next few weeks.
What makes this different than my previous design is the ease of locating the parts. Since my first design was made of 35mm projector parts, they are hard to find and expensive when you do find them.
The new version of the long play system links a 16mm projector to handle all super 8 film transport.
The steps for this are easy:
· Locate a 16mm projector. Easily done on E bay * .
· Replace the motor belt. Yes – still available!
· Add a super 8 brass adapter to the 16mm projector take up shaft.
· Construct a bench or free standing tower to hold all of your equipment.
Run the film through the top mounted super 8 machine to the 16mm take up machine via film guide rollers.
While this is currently in testing mode, it is my intent anyone can obtain parts from me with the instructions on building and set up. Within a few months.
Removing film transport from the primary super 8 machine is a good idea. It DOES make a difference. Super 8 projectors have many jobs to do and only a maximum amount of energy to do it. If you free film transport from that said machine – now that said machine has slightly more energy that it can put to film play and sound reproduction. Thus, wear and tear on the drive train is reduced.
A 16mm machine set at 18FPS nearly matches the 22 foot per minute of the super 8 24FPS output. And, the 16mm machines have spring loaded stability built in to the take up assembly and it is this stability that gives smoother take up. Less film makes contact with the flanges of the reel – and better – not more – tension is automatically controlled.
* You can start browsing here:
http://shop.ebay.com/?_from=R40&_trksid=p3907.m38.l1313&_nkw=b ell+16mm+sound+projector&_sacat=See-All-Categories
More details soon.........
[ November 08, 2009, 11:09 AM: Message edited by: Chip Gelmini ]
| IP: Logged
|
|
|
|
|
|
|
|
|
|
|
|
Chip Gelmini
Phenomenal Film Handler

Posts: 1733
From: Brooksville, FL
Registered: Jun 2003
|
 posted November 02, 2009 10:20 AM


PREVIEWS OF COMING ATTRACTIONS....
Note: I am just beginning this project. Please allow plenty of time for me to gather more information. As time permits over the next several months I will be giving more information.
At some point I will ask those interested to email me privately. DO NOT DO THIS NOW. By then I will have documentation with photographs ready via file download attached to email.
For now though, just some basic information:
Begin text:
BR 2000 PT16
Introduction
This is the third long play unit for super 8 sound film that I am building from scratch. It allows a film collector to run large reels using a projector that is not designed for this purpose. This project does not modify the projector the user already owns. His machine is simply inserted into a wooden cabinet or structure. His projector is run without reels and will only be used to pull the film through via picture and sound reproduction. An upper assembly above his projector will hold the large reel of film. And a secondary device will be placed under his projector that will be used for take up film transport.
My first two long play units were made from older 35mm projector parts. These were easy for me to find because at the time I was working as a theater projectionist and had contacts to buy the used parts from technicians traveling the theater circuits. Being a projectionist and having connections within the business made that simple. But that isn’t easy for someone who does not work in a movie house.
My first two units required separate speed controls operating DC motors which pulled on a 35mm clutch system. After 5 years if working, I began to suspect that in the long term possible damage to the main projectors could result if the speed controls pulled too hard. Even though things seemed to be working very good, this has been a long time concern of mine. So, I set out to create a better, more automatic version using a very simple idea. Another projector.
A secondary projector is perfect because it is designed to handle the load required with the proper amount of tension and speed. With just a little bit of arithmetic and history of motion picture film speeds, I soon picked a machine that was perfectly capable of handling the task. This process now is virtually automated. Either it is running, or it is not running. And when it runs, it will set the speed and tension without me doing anything else to it.
Along the way to creating the BR 2000 PT16 there were some bumps in the road. The biggest problem was the 16mm projector shaft and converting it to hold super 8 reels. How to go from square to round. And on top of that, the shaft on the projector series that I selected, was designed for 16mm with a spring loaded bearing within the shaft. It did not have the spring loaded lever that folds over on the outside of the hub keeping the reel on the shaft as found on other machines or hand crank rewind units.
The simple way I found to change this was to take a common known brass adapter, and have a special one made just like it. The only difference was this brass adapter shaft would be 2.75 inches long. This would allow for the reel to slide on, and then add a locking collar that is set to the reel flange and tightened to the brass adapter. This was tried and the very first reel ran perfectly.
This has been constructed with film transport safety in mind. Everything from rollers, reels, bearings, mounting blocks, 16mm projector models, castings and arms, brake and tension, has been carefully selected, inspected, and tested once, twice, three times and in no way can your valuable film prints be damaged during presentation.
Thank you for your interest in this project.
End text
-CG-
| IP: Logged
|
|
Chip Gelmini
Phenomenal Film Handler

Posts: 1733
From: Brooksville, FL
Registered: Jun 2003
|
 posted November 06, 2009 02:53 PM


PICTURES ARE IN!
PROJECTORS ARE WORKING!
The text under each picture describes it.....
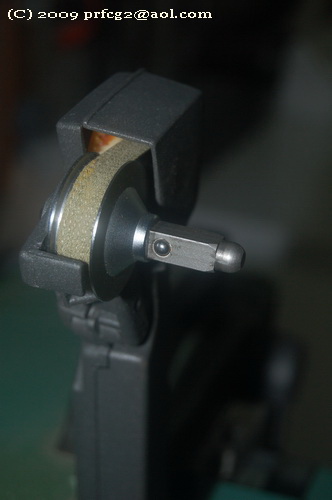
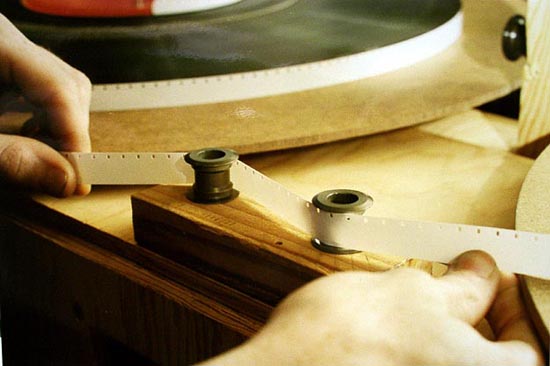
The Bell & Howell classroom projector take up arm assembly. With a few short steps we convert this to super 8 big reel take up!
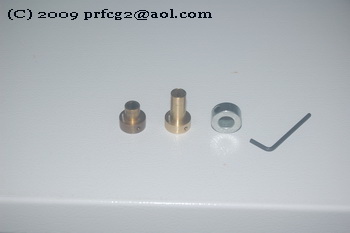
Left: A standard brass adapter. This is too small. There is nothing to hold the reel on.
Center: The new brass adapter with an "extended Shaft."
Right: The locking collar. This will hold the reel on to the extended shaft adapter.
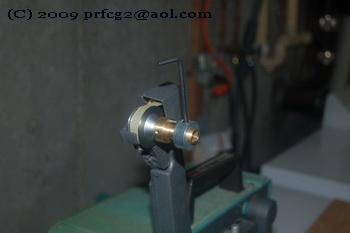
The new brass adapter & locking collar installed to the 16mm projector shaft.
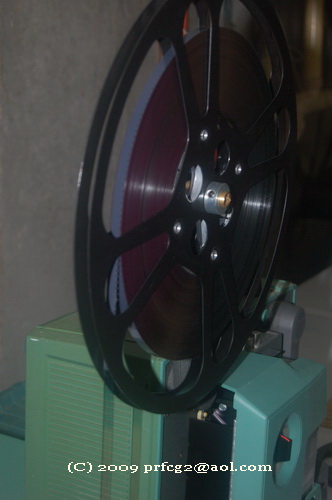
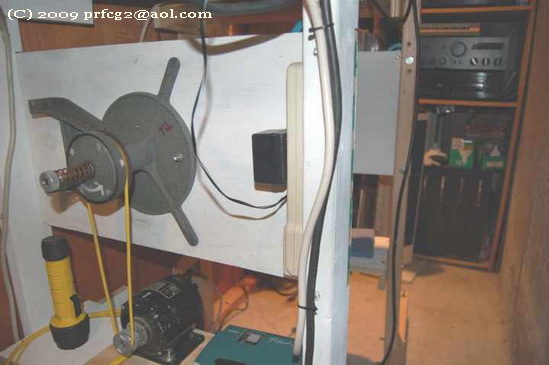
Finally! It really works! A 16mm projector running super 8 large reels! You're looking at a Goldberg 1600 foot reel with 1,000 feet of super 8 film.
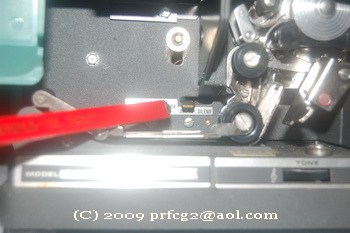
As discussed earlier, you must set the 16mm projector for silent projection. This nearly equals the (footage per minute) of the super 8 machine running at 24 frames per second. The difference is easily controlled by clutch friction. In most B&H machines made after 1974, the switch is located directly under the lamphouse.
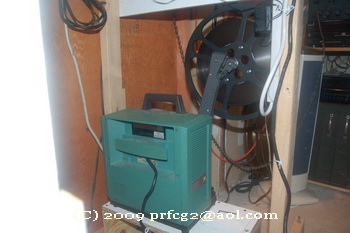
The conversion complete below Tower 2. You might want to build a riser board to hold the projector just a few inches off the floor. Your riser board should be no more than 7" off the floor assuming your guide roller is 35 inches off the floor. The projector will be run with the take up arm in the UPPER position (rewind for 16mm). This saves space and works just fine. There is no harm to the projector mechanics or the super 8 film print.
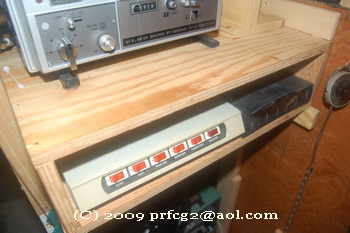
Select a power center so you can control the projectors without having to bend down to the ground just to start one. A power center switch works the same as the power switch on the projector. Either it is or it isn't running. You can use the other switches for the other equipment as well. As shown above, the switches are assigned as:
MASTER = MAIN POWER
COMPUTER = ELMO ST1200HD
MONITOR = SOUND SWITCH BOX*
PRINTER = 16mm TAKE UP MACHINE
* Used as a mono stereo switch linked to aux output and/or dual track output from the ST1200HD
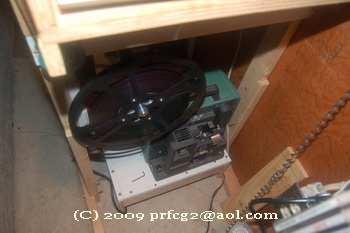
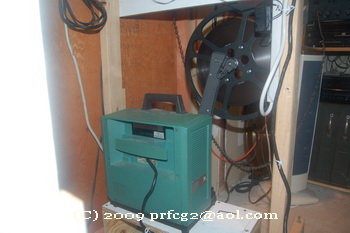
Operating side of the 16mm machine installed below Tower 2 sitting on the riser board.
THE RISER BOARD
Cut 2 pieces 6.75 x 10.25 inches. These are the "ends"
Cut 1 piece 10.25 x 20 inches. This is the "top"
Cut one piece from 2 x 3 stud @ 18.50 inches. This "support" and is installed underneath.
Install the two sides to the stud evenly. Use wood screws and glue.
Install the top shelf evenly to the top of the main unit.
Allow to dry if glue is used.
The riser board is made out of .75 inch thick plywood.
It is just the right size to hold the B&H classroom projector models made in or after 1974.
These measurements assume that:
1. The lower take up guide roller is 35 inches off the floor.
2. The top of the 1600 foot reel when mounted to the projector with the take up arm in the UPPER position (when rewinding 16mm film) is 28 inches off the floor.
3. The riser board raises the projector so that the top of the take up reel (as discussed in step 2 above) is 32 inches off the floor.
4. Should you choose to use one, there will be room between the final guide roller and the top of a 2,000 foot super 8 reel for even longer showings between reel changes.
ABOUT THESE PARTS:
I have been on this mission to improve my Tower film transport for a long time. And it has taken a long time just to have some of these parts specially milled out for me to do what you have just seen.
This has only been installed for less than one week and is running great. However, a considerable amount of time is needed to test this completely.
That being said, there are many "what if?" situations that I have not dealt with yet.
I encourage anyone interested in this project to do it themselves. There is nothing better than designing something and see it come to real life and work better than you expected.
But do so carefully, and at your own risk.
Thanks for your interest and I welcome comments and questions. I'll be happy to help any way that I can in the hope that you can create your goal as I have.
Signing off.....
CHIP GELMINI
| IP: Logged
|
|
Chip Gelmini
Phenomenal Film Handler

Posts: 1733
From: Brooksville, FL
Registered: Jun 2003
|
 posted November 06, 2009 06:12 PM


PROJECTORS & ENERGY
Theory behind Secondary Spooling
Older movie projectors used at home are getting harder to find and repair. These have been discontinued for a very long time. The good old days of walking into a camera shop and seeing a variety of projectors in the display case or hearing a salesman ask, “Can I demonstrate one of these for you?” are over. So now, we collectors are faced with the unavoidable. Learning to fix our own as best we can, and finding spares in good condition at reasonable prices. Sadly, some of those choices are nearly impossible and always seem to strike backwards. That is, you pay a high dollar price and you get a Junker.
Projectors have several jobs and only a maximum amount of energy to do these jobs. This is true of most things that are mechanical or electrical in some sort. It’s even true of us. We start our day, refuel several times, and by days end need our rest so we can do it all over again soon.
Projectors must (1) Spool the film running heavy reels; (2) Put light on the screen; (3) Cool the source that produces that said light to the screen; (4) reproduce audio. Number four is not high on the energy consumption list because it is electronic as compared to mechanical. But still, it’s a job.
So there’s four jobs that share one hundred percent energy.
Now what if we could eliminate one of those jobs and free up a little more energy that can go to three jobs. But wait. We can do better than that. We can do much better. We can eliminate the toughest of those four jobs. And we do this by adding a secondary take up device that frees the machine from spooling those large heavy weighted over filled reels.
Imagine your home movie projector just pulling the film through! Of course this is nothing new. I remember in the late 70’s a company in Wisconsin called Racine and they made the Extend-A-Reel. I remember an article in Super 8 Filmmaker suggesting this was a monolith that stood behind the super 8 projector.
By 1998, I started to hear of a man by the name of Mr. Spondon from England. And he had his version, the Spondon Spooler.
And in 2005 I created my own. The BR2000-PT. Made of 35mm parts, it did just what I have mentioned a few minutes ago. By 2009, I came up with the newest version which is described in previous documents.
With a super 8 projector showing the super 8 film, it is running easier not having to spool the film along with everything else it has to do. So naturally, it can do a better job likewise.
The 16mm machine converted to super 8 take up is made for larger gauge film. So it has slightly more power to do that single job. Speed is reduced to prevent pulling harder than required on the super 8. And since the 16mm machine is running without pulling film through, it is doing three less jobs even though all the parts are of course in motion. There’s no film threaded; no hot lamp to cool; no continuous rotation required of the sound drum and flywheel shaft; and so on. And since take up is one of the hardest jobs for the super 8 machine to do, there is no better combination than using the next machine best for it!
The End
Theory behind Secondary Spooling
| IP: Logged
|
|
|
|
|
|
|
|
|
|
|
|
|
|
|
|
|
|
Brad Miller
Administrator

Posts: 525
From: Dallas, TX, USA
Registered: Jun 2003
|
 posted November 07, 2009 04:18 PM


Alan,
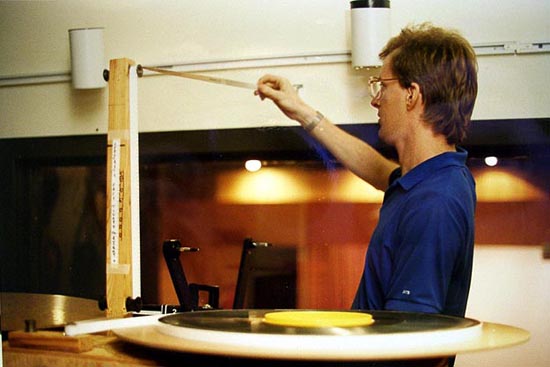
If you are just trying to create an extended play system (meaning, rewind after each show), then all you really need is to do something simple. Chip's examples work quite well, and I particularly like the way he did the pictures above by building a "tower" sort of thing with a shelf specifically for the projector. I used to have this soundproof box with ventilation and a mini-port window that we used for situations where we didn't have a booth. In that instance the long play (or platter) would sit beside the box on the outside since it didn't make any noise.
The way I did the extended play systems were to use direct drive motors coupled straight to the shafts. Look closely at the underside of the deck in this picture:
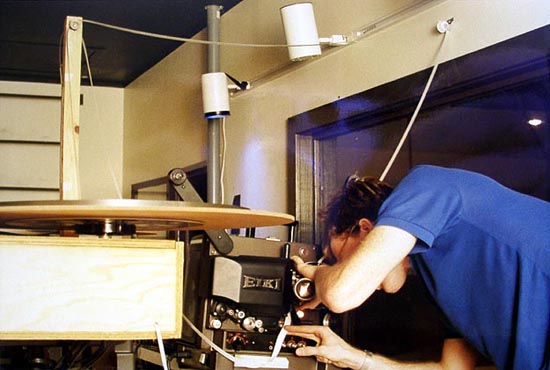
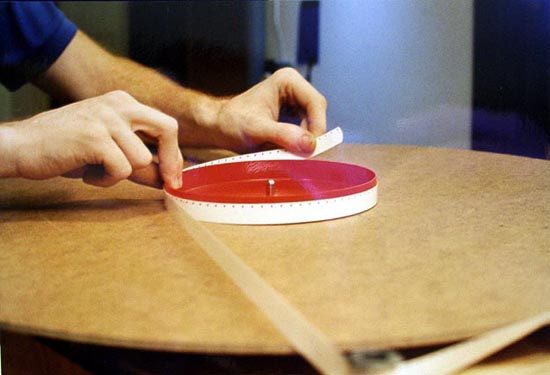
What you see is a 16mm drive shaft with half of an Eiki 2000 foot auto-takeup reel. On top of that is the masonite deck. This way entire features could be built and stored in the closet on the masonite decks for multiple movie changes in the same day (since purchasing 6000' reels was FAR more expensive than making a bunch of masonite decks).
When the movie was threaded and ready to run, both motors would simply be turned on. This provided not only takeup tension, but electronic backtension from the feed platter as well (as opposed to using a clutch like an upper reel arm). The faster the supply reel was spinning, the less backtension there would be (which is what you ideally want). During rewind you only needed to turn both motors on. With the supply reel being empty, it had more power to start the process, and as the movie continued to rewind the takeup reel would lower its backtension due to the weight and drag (also ideal).
Later models of the extended play or platter units had a small arm that would remove any small amount of bounce on the takeup (which only ever really bounced the first few seconds of the startup), and was setup in a way that if the film broke or the movie tailed through the projector, the arm would fall onto a microswitch to turn off the motors on the extended play/platters. That was then extended to turn off the projector and other things.
| IP: Logged
|
|
Chip Gelmini
Phenomenal Film Handler

Posts: 1733
From: Brooksville, FL
Registered: Jun 2003
|
 posted November 07, 2009 09:50 PM


Hello everyone
Thank you very much for your comments about my project.
The basic idea for the Tower came about when I dreamed of a super 8 projector being made from a 35mm company. For me, the choice would have been Century projector corporation. Of all the ones I ran in the business, I liked Century the best but this is of course as personal choice.
Point being, the top to bottom layout is grand. I was never really crazy of these home projectors with "front to back" reel arms.
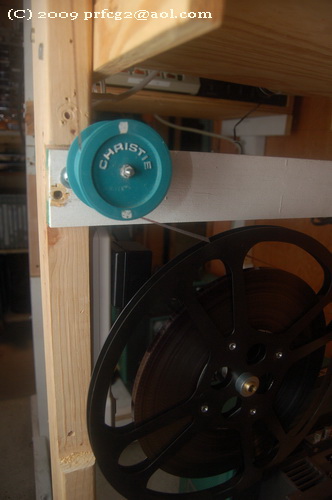
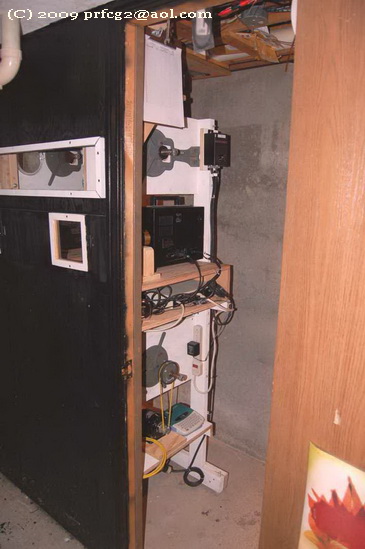
Below I will try and post another picture of my Tower and a picture of a carbon arc projector for 35mm. You see how both upper reel, picture and sound head to lower reel all seem to match.
 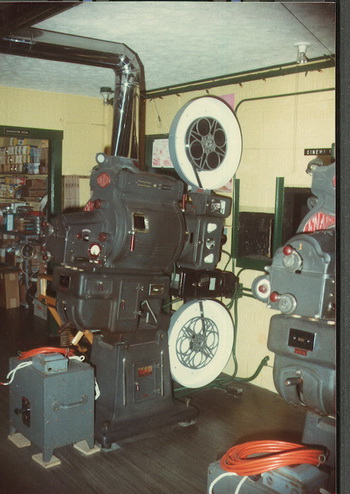
And for those interested, I am still running with changeovers. I have always felt this is the way it should be done. No interruptions from start to finish. No single machine running the entire show.
With all the reels available and various types you can find, most of the reels that you guys use on your reel arms I only use them for storage.
I have always believed that, reels for storage or shipping should be used just for that purpose. And "house reels" should be used only on the projectors.
For example, suppose you have in your collection 10 of those classic Elmo reels holding your library of films - the aluminum 1200 foot. Consider replacing those reels with plastic.
And before you run a show, spin the film off plastic and rewind on to the Elmo reels. And only put the Elmo reels on your projector shafts. They are highly recommended and they were built for the Elmo projectors, right guys?
When your show is over, rewind the reels back on to the plastic for storage.
That's the idea. And for those of you who want to know, I follow that procedure every time I run. My Towers will run any kind of reel I have and any size. But that's besides the point. And my preferred house reel is the Goldberg super 8 reel @ 1600 feet.
And by the way if you own super 8 you won't think of my idea as extra work. If you own super 8 it's a labor of love.
![[Smile]](smile.gif)
| IP: Logged
|
|
|
|
|
|
|
|
|
|
|
|
|
|
|


 UBBFriend: Email this page to someone!
 Printer-friendly view of this topic


![[Big Grin]](biggrin.gif)






![[Smile]](smile.gif)

