|
Author
|
Topic: Repairing a Sankyo Stereo 800 - The Journey
|
|
|
|
|
|
|
|
|
|
|
|
|
|
|
|
|
|
|
|
|
|
|
|
|
|
|
|
|
|
|
|
|
|
|
|
|
|
|
|
|
|
|
|
|
|
|
|
|
Pete Richards
Master Film Handler
Posts: 302
From: Australia
Registered: Sep 2010
|
 posted July 05, 2013 07:55 PM


A few ways to find out. Easiest first, from you location I am guessing you are on 110v?
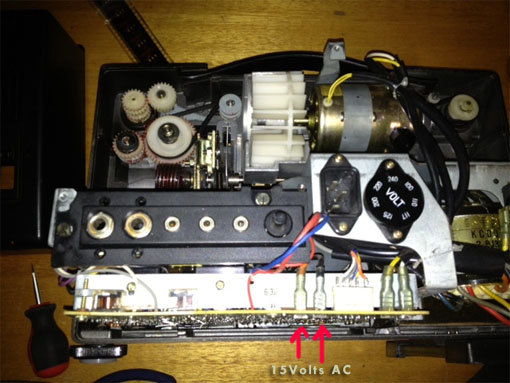
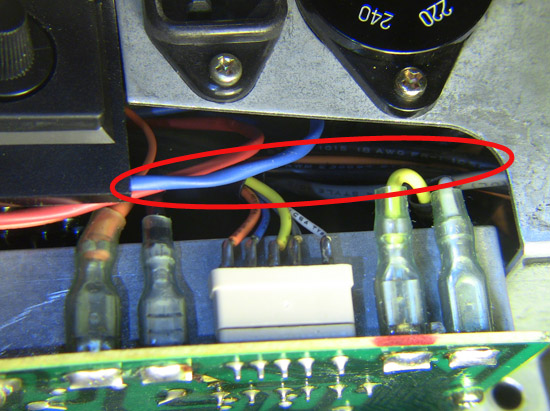
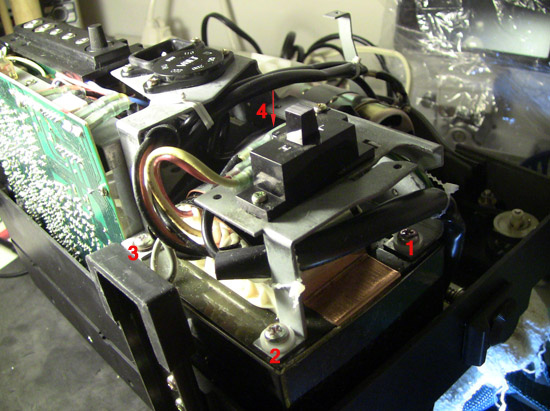
The power goes into the projector via the power socket. From the back of the socket there is a blue wire that goes straight to the transformer, and a brown wire that goes into the Round Voltage Selector. Various wires come out from the voltage selector to the transformer depending on the selected voltage.
So one thing to try, if you are on 110V, remove the pwer cable, then remove voltage selector disc by pulling it straight up, and change the voltage selection to 117V. This would cause the projector to run at the wrong speed but won't damage anything.
Do that then test your voltages again. This will at least check if the wire from the back of the voltage selector to the transformer has burned out. (also check the volatge selector disc for signs of damage when you remove it).
If there is still no voltage present, then remove the power cable. Undo the two screws holding the power socket in, and the two screws holding the voltage selector. You can now pull both of these up to inspect the wires behind them and look for damage.
My projector is now in pieces everywhere too!
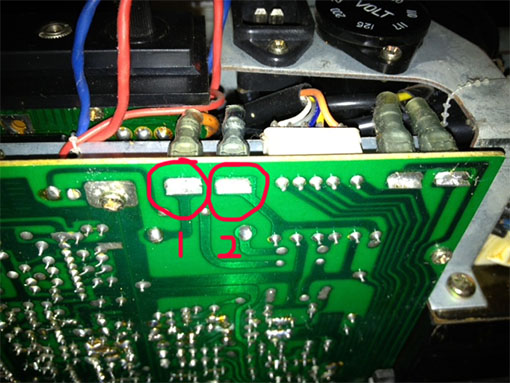
If you can't see any damage then we can check for continuity by testing from the power socket to the centre pin of the voltage selector, and from the earth pin to the projector chassis.
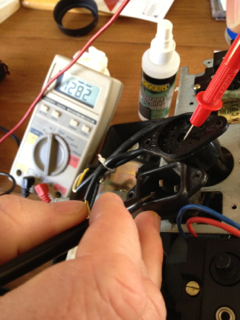
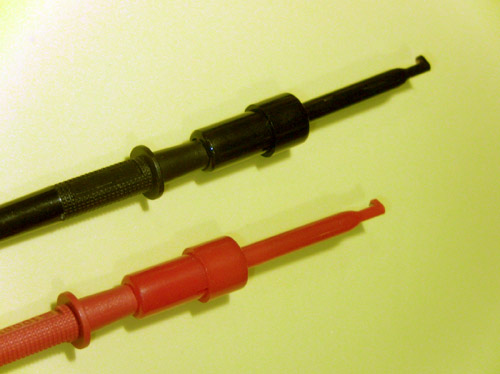
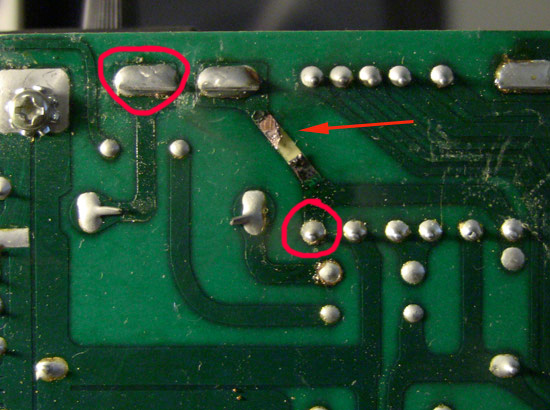
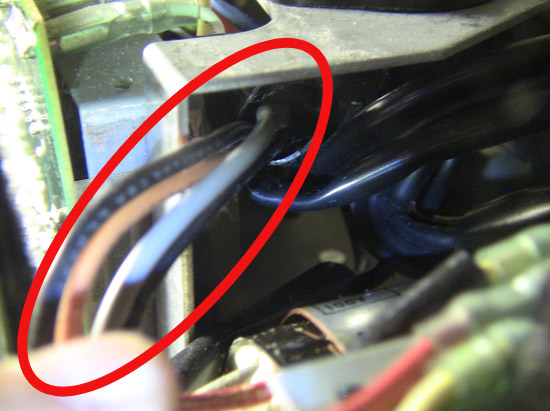
Set you multimeter to continuity (or beep mode if it has it) or to OHMS to check for resistance. Put the probes as per the photos and the multimeter should beep or show almost zero resistance. That will tell us if two out of the three wires are okay from the power socket to the transformer.
Testing the brown wire continuity
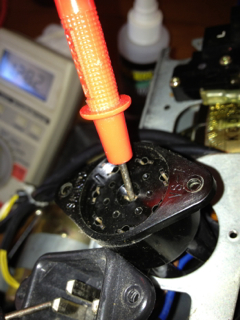
Close-up:
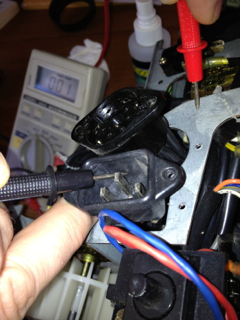
Testing the earth continuity
| IP: Logged
|
|


 UBBFriend: Email this page to someone!

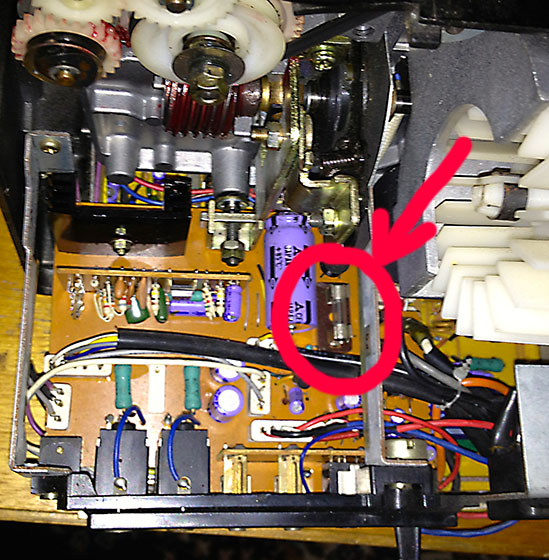
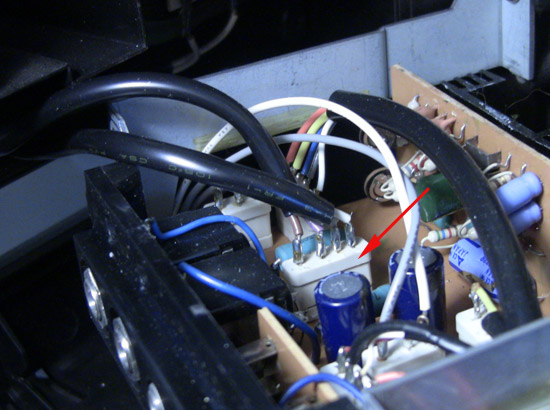
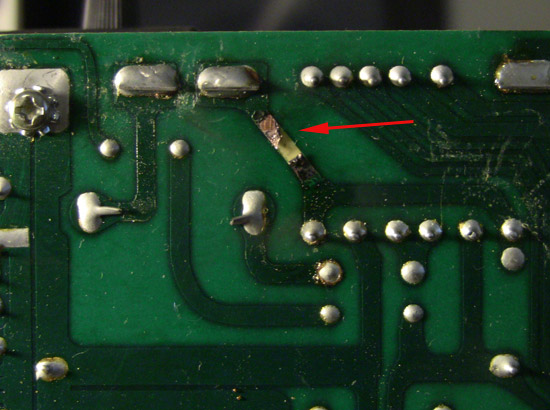
![[Confused]](confused.gif) ...and your capacitor looks shorter to me.... but maybe not
...and your capacitor looks shorter to me.... but maybe not ![[Roll Eyes]](rolleyes.gif)
![[Wink]](wink.gif)

![[Smile]](smile.gif) Let me know what else I need to check...I'll do it tomorrow.
Let me know what else I need to check...I'll do it tomorrow.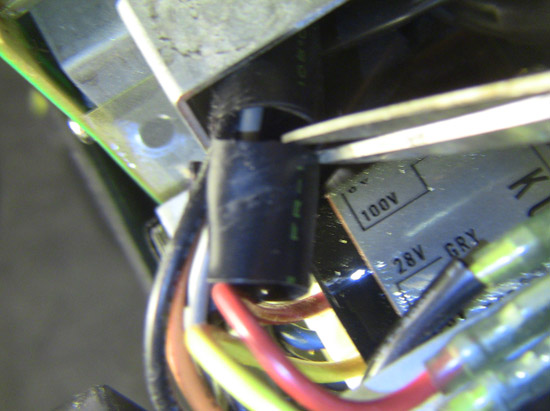


 Printer-friendly view of this topic