|
Author
|
Topic: Review Wolverine Reels2Digital MovieMaker 8mm film digitizer
|
|
|
|
|
|
|
|
|
|
|
|
|
|
|
|
|
|
|
David Brown
Film Handler
Posts: 42
From: Centerville, UT, USA
Registered: Oct 2019
|
 posted November 18, 2019 11:01 PM


Limited test of the "capstan" that keeps the film moving when stopped by torn sprocket holes.
First I intentionally cut out 6-7 sprocket holes on both R8mm and S8mm.
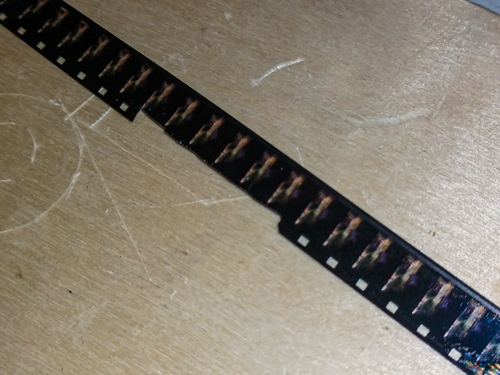
The test is done with a momentary contact switch as I don't have the Hawkeye mod that would be automatic. When the "torn sprockets" pass the claw, the film stops advancing. The motor's pull seems to be stopped by the claw in the next good sprocket hole.
It works, however there are other problems I found.
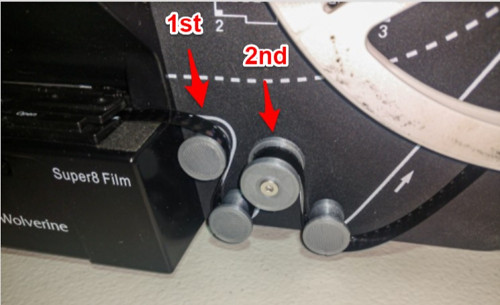
The best location for the sprocket (toothed pulley) is on the second existing position shown above. That is where I began. Using S8 with the gate closed, the claw down.
Problem: From position 2, the motor does not have enough torque to move the film. I then moved the sprocket to position 1. Pulls the film thru the gate very fast!
The second position 1 has less teeth (2-3) engaged with the film. The film contacts a smaller percentage of the sprocket.
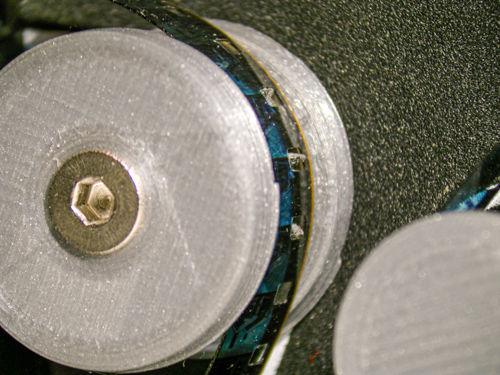
I used the standard Wolverine takeup & a reel without a drive key. Strong and Weak tension, with each the sprocket continues to rotate even when the teeth disengage.
My sprocket wobbles. I tried more than one sprocket.
sprocket video
I'm not sure why it wobbles. I will investigate. Projectors often have a clamp or secondary wheel to maintain contact with the film and sprocket.
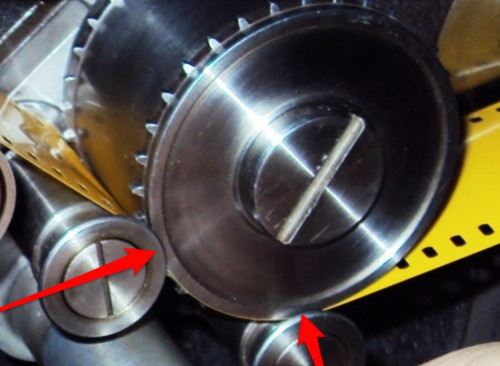
I don't want to add more parts or complexity to this process.
Making the teeth longer (not much longer) or fixing the wobble is best.
That said, all the tests I did with torn sprocket holes S8 & R8 were successful while capturing. The film stops moving, push the button, it resumes.
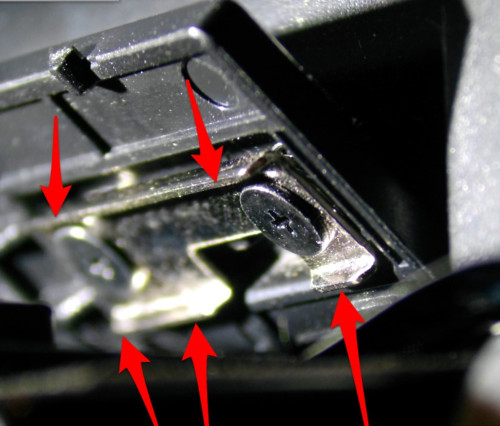
Gate tension is a spring-loaded channel that presses on the outside edges of the film.
I did also have 1 R8 film that could not be moved by the motor from position 1. There was more friction in the gate (?), but only when closed. Looks like I can't adjust the gate tension screws without dismantling the Wolverine. This seems also likely to happen with magnetic striping on S8. Seems I've read of width differences with R8. Caused by the splitter when processed? The film base itself is not thicker than S8.
Also, torn sprockets could be repaired with a single side of Kodak presstape. Damage would be discovered while cleaning the film. If the sprocket perforation damage is extensive, capturing the film will be missing as many frames. Then another method of capture is called for.
I had a cement splice that always stopped outside the gate. Saddly it was broken before I could test it. The motor probably could not pull a bad splice. Not much torque there before reaching speed.
Kamel The R8 sprocket
| IP: Logged
|
|
|
|
|
|
|
|
|
|
Doug Maxwell
Junior
Posts: 12
From: Charleston, WV, USA
Registered: Sep 2019
|
posted November 19, 2019 10:12 AM
I did my first test scan last evening with the Hawkeye upgrade. Very pleased. Of course, the scan quality depends greatly on the source material... I have a roll of S8 of a mystery family at Disney. It came with a lot of used film gear I bought in the 90s. It's my go to test roll because of no sentimental value. It's bright and vivid and mostly in focus and has lots of different colors (bright reds and yellows, good greys, etc) and hot spots and dark areas throughout.
Scanned on auto settings into jpeg images. I imported it into Adobe Premiere Elements and reduced the speed to get it close to 18 fps. Cropped and exported at 1080.
1 minute 57 seconds of jpegs was about 3 gig, which is not shocking. I wanted to go as big as possible and this is a good start.
Premiere Elements is rather frustrating when you're used to the full house Final Cut Pro, so I couldn't center and enlarge the image, but I'll sort that out eventually.
I have another roll scanning. I'll be doing a lot more experimenting. Any updates or lessons worth mentioning will be posted.
Side note, I didn't use the takeup reel and instead let the film dangle into a clean plastic tote and then rewound it with a mechanical rewind. This method didn't seem to affect the gate quality.
Scan is uploaded here.
https://youtu.be/9KwIBGx0z5w
| IP: Logged
|
|
|
|
|
|
|
|
|
|
Bruce Davis
Film Handler
Posts: 47
From: Adelaide, Australia
Registered: Sep 2019
|
posted November 19, 2019 09:04 PM

Kamel Ikhlef Quote " Bruce, what did you put to block the lens focus, it's white teflon ?... I block with several rings. "
The unit I have was built by Stan Jelavic, it does not have the 3D printed lens adapter but looks like metal. The lens only just screws into the adapter thread by about 2 turns. Stan used Teflon tape perhaps to seal against light or perhaps to add friction on the thread to stop it rotating by itself, Not sure.
Doug Maxwell, your capture seems very dark, have you compared the image quality between projection and Hawkeye. I still get better resuts by capturing the projected film/images with my smart phone from the projector.
Have you tried using VirtualDub v2_43803 and AVISynth v2.6 official, I find this combination (mainly using VirtualDub, AviSynth allows running Scripts like Video Fred) for me is better than trying to wrestle with premiere.
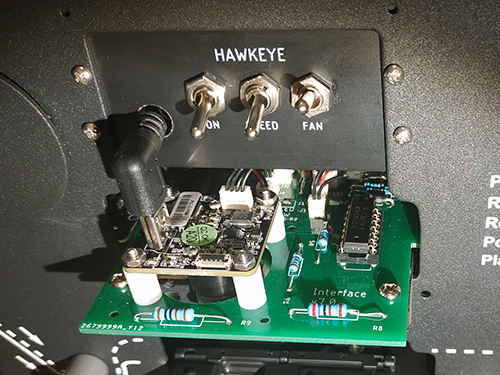
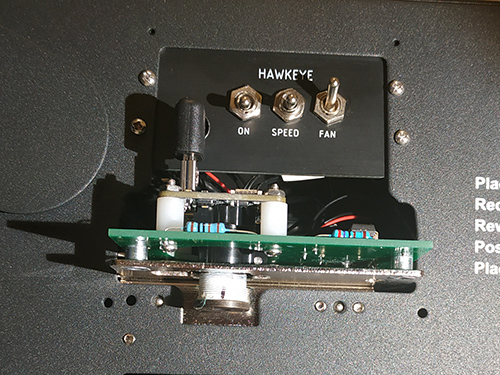
David Brown Hawkeye is on the left and yes I mentioned the grass seemed too green.
| IP: Logged
|
|
|
|
Doug Maxwell
Junior
Posts: 12
From: Charleston, WV, USA
Registered: Sep 2019
|
posted November 20, 2019 08:51 AM
Widely varying monitor quality has certainly been a long term issue since everything went digital. My big computer uses a 50" 4K LG OLED TV for a monitor. It is also the TV I watch most of my TV and movies on, so I have spent much time tweaking the settings to make it look beautiful. The scan is a touch dark, I agree there. It was literally my first scan with the Hawkeye upgrade.
In film production world, there are generally two types of telecine transfers for film. A 'one light' and a 'scene to scene'. Pretty self explanatory. I haven't played with it enough yet to determine if the auto exposure setting on IC Capture adjusts the levels as it goes along (scene to scene) or gets an exposure with the first several frames and locks in that level for the rest (one light). Though in general, a projector is certainly considered 'one light' for obvious reasons, so it's just a question of finding the exposure level that makes the whole roll look good (assuming the source film is properly exposed). Anyway, I will be curious to see who has played around with the setting to get a proper exposure level from frame to frame.
A quick note about Premiere ... I will eventually be getting the full version of Adobe Premiere for some other projects, so I'm sure my current post scan woes will be eased. For now, I'm just in the slow lane feeling out the gears.
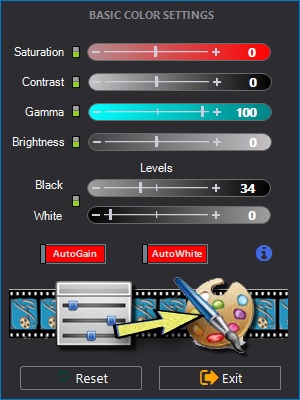
A general statement concerning colors, etc. My personal mantra for scanning and preserving family films for the future (FFftF?) is to have everything nice and sharp and visible. Color quality is certainly desired, but not #1. With that, I would say that in your scans, don't fight the film stock. Film stocks varied between manufacturer and had different looks and color tones. If greens and blues are a bit saturated, don't fight it (unless it's obviously wrong, of course). The natural inclination might be to make it look proper across the whole spectrum, but that might not be possible and, to me, would take away the charm a bit. Let the Kodak be a bit more red and yellow, let the Fuji be a bit more blue and green. They were made to be that way.
| IP: Logged
|
|
|
|
|
|
David Brown
Film Handler
Posts: 42
From: Centerville, UT, USA
Registered: Oct 2019
|
posted November 20, 2019 03:54 PM
Kamel
I just wanted to be certain of a proper print. I have no PETG yet. I went to https://www.shapeways.com/
Took a week, they are located in NY & The Netherlands.
Although there was a choice of steel or aluminum, there was no ABS or PetG!
MJF Plastic PA12
Also known as HP Multi Jet Fusion PA12, Professional Plastic, HP Nylon Plastic, PA12, Polyamide
Multi Jet Fusion (MJF) Plastic PA12 is HP's nylon plastic with excellent mechanical properties and a slightly grainy finish.
Common Applications
Mechanical & structural parts, mounts, cases, eye frames, tech accessories, drone parts, home décor, miniatures, art, prosthetics
| IP: Logged
|
|
|


 UBBFriend: Email this page to someone!

![[Wink]](wink.gif)
![[Smile]](smile.gif)


 Printer-friendly view of this topic