This is topic Outdoor Screen setup (how I built mine) in forum 16mm Forum at 8mm Forum.
To visit this topic, use this URL:
https://8mmforum.film-tech.com/cgi-bin/ubb/ultimatebb.cgi?ubb=get_topic;f=5;t=001595
Posted by David C. Lucidi (Member # 4020) on April 20, 2017, 09:35 AM:
Hi all,
This is actually a response to a previous thread regarding a request for information about building an outdoor screen. Hopefully this information offers some advice as the weather gets nicer and outdoor projections become more available.
First I will preface what I am about to say, by saying to consider getting an inflatable before building your own. I have one now and I will NEVER go back to the trouble of building my own screen again. The one I have IS pricey (about $1200) but I got a really good deal from a member on the the 16mm forum about 2 years ago. It takes 5 mins to setup, 10 mins to tear down/pack away, and fits in a plastic tote approx. 18" x 18" x 50" (and that includes the air pump). The one I have is an Open Air Cinema Home model 16' wide. It's made for the new digital projector 16:9, but works fine for our setup, too (for a 16mm 4:3 aspect ratio, you get a projected screen image approx. 9' high x 12' wide). This is a VERY large inflatable screen, but I was replacing a 12' x 16' screen I previously built as described below (so the inflatable is actually smaller!)
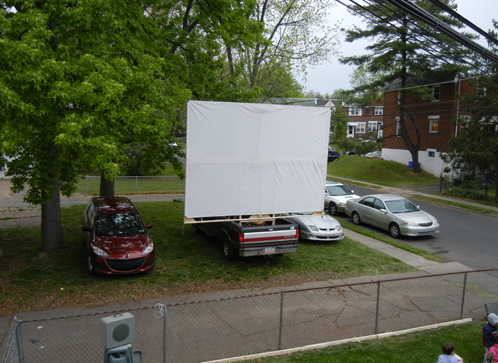
When I built my first screen in Spring 2012, I built the frame using 2' x 4's. At a 12' x 16' size, it weighed a LOT. I used a white vinyl dropcloth with grommets (about $45) and stretched/screwed it onto the wooden frame (using most of the grommets and screws/washers). The frame then had a secondary "L" bracket made, that sat in the back of a pickup truck (to give the screen proper height off the ground). The "L" bracket had the screen bolted to the vertical bars, and the horizontal bars that sat in the back of the truck had (4) 80lb bags of concrete sitting on them.
I should out a PSA out that at this size, even a mild wind will cause great risk of injury if a screen this size falls over. Thus why all the heavy duty construction.
You can see the start of the screen frame being built, and the "L" bracket, here:
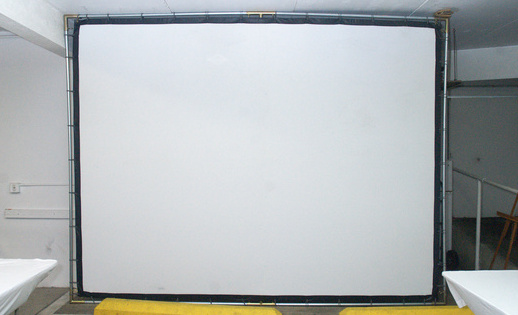
Here's a picture of the screen frame bolted to the L bracket:
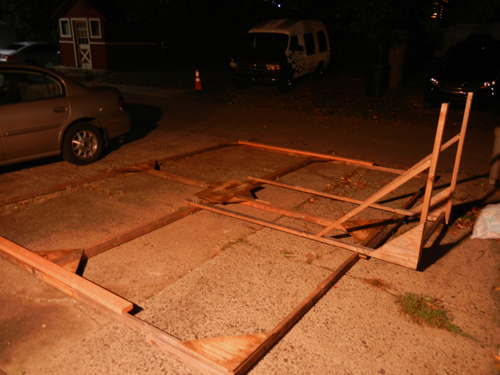
Here's a picture of it in the truck, assembled:
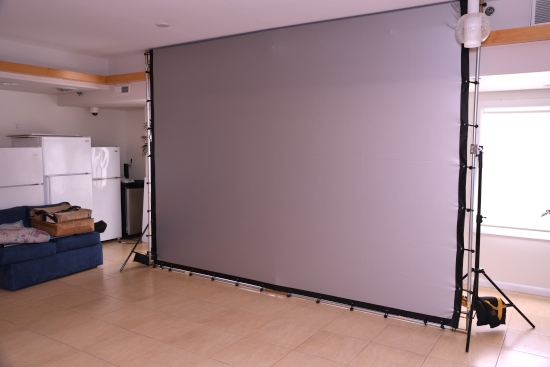
When it came to using the vinyl dropcloth, the problem with it was no matter how relaxed it was in the sun, or stretched on the frame.....it still showed wrinkles (part of the problem is that it was glossy). It also had no blackout behind it...meaning if you stood behind the frame, you could see the image (this created some brightness loss as well when projected). Here's some pictures of the wrinkles before I sat it in the sun, and after (note there were still wrinkles in the daytime picture).
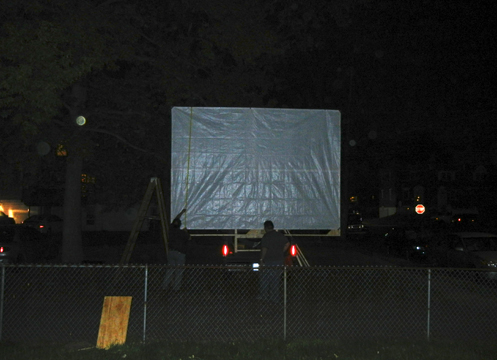
One of the problems I encountered on this first build, was that the night of the movie party, it got cold (it was late April) and the screen started to want to "shrink", creating really bad wrinkles. No one complained, but I hated how it looked. After the party, the teardown took FOREVER. I had to undo every screw that held in the grommets. Then undo the entire frame, and store it under my deck (no room anywhere else). I re-used it that fall (2012) for another party. But then like an idiot, I left it outside all winter under the deck -- unpainted, unprotected. Between the previous summer (2012), the harsh winter (2012), and the following summer (2013), leaving it outside took it's toll on the wood. By the fall of 2013 when I went to use it for the next movie party, most of it had splits in it, and I ended up scrapping all the wood ![[Mad]](mad.gif)
When I scrapped the wood, I realized it was time to re-think the construction to see if a better method could be made. The current setup described above took 4-6 guys to put together and "hoist" into place into the back of the truck. it also helped having that many around to dismantle it after the show.
When I re-did it in fall 2013, I used 1' x 3's instead of 2' x 4's, to reduce weight. However, it also reduced stability, something I was concerned about should a strong wind kick up. Thankfully, that didn't happen, but I debated whether I'd stick with the 1' x 3' setup for future shows. Meanwhile, my wife was sick of:
A.) All the money being spent on wood.
B.) The amount of space (and eyesore) all that dismantled wood looked like under our deck.
C.) The amount of effort being used to setup the screen (I usually didn't set it up until 1-2 hours before the movie, in case of wind during the day).
D.) The safety of the the setup (if it fell it could literally kill someone).
2014 we planned a movie but due to circumstances we had to cancel. Spring 2015 is when I started working on the next idea to make this easier/safer/cheaper. But I'll stop for now and let others chime in/relax their eyes (and allow a new response from me to fit more images! ![[Smile]](smile.gif)
Posted by Greg Perry (Member # 5177) on April 21, 2017, 08:37 AM:
David,
It is interesting to see the photos and hear about some of the pitfalls of the home-built approach. Looking forward to hearing about your experience with the inflatable screen...great of you to share all of this....
Greg
Posted by Bill Brandenstein (Member # 892) on April 21, 2017, 06:18 PM:
David, that's a really helpful historical survey of your screen situation!
The way to do this on the cheap assumes there's a shed or wall or building from which to hang a standard pull-down screen. That's what I do. My situation is also much smaller as well as convenient for such. But to have the screen out in the open (or in the back of the pickup) was both really cool and out of my budget.
Posted by David C. Lucidi (Member # 4020) on April 23, 2017, 08:55 AM:
Yea Bill, my location unfortunately does not have a "backer" (i.e., wall, shed, etc.) to lean the screen up (or fasten it to) from behind, so I had to come up with another way to make it work.
Also, the size was originally determined based on the throw of the projectors. I had everyone in my yard (pictures coming soon in another post) and the projectors were behind the audience -- approx. 85' away from the screen. At the time, I was using 80-25 Kalart Victors (Halogen), and the Kalart Victor zoom lenses would cut the light down too much. So I had to use the standard 2" lens (all that I had). Same with when I switched to using my B&H Military projectors (2585 AML), I was still using the 2" lens. When I got my inflatable, the height was less, so I had to use zoom lenses (or risk moving the projectors closer, which would limit the number of people I could fit in the yard). I bought (2) ISCO Kiptaron Zoom lenses (probably the best available for 16mm). Only problem is those zoom lenses are NOT cheap ($200-$300 EACH...and since I have a changeover setup, I needed 2) ![[Frown]](frown.gif)
(More pictures/explanations to come, along with the inflatable/zoom setup) ![[Smile]](smile.gif)
Posted by Bill Brandenstein (Member # 892) on April 25, 2017, 02:02 PM:
Too bad a cinder block wall can't be made, um, portable!
Visit www.film-tech.com for free equipment manual downloads. Copyright 2003-2019 Film-Tech Cinema Systems LLC

UBB.classicTM
6.3.1.2


![[Mad]](mad.gif)
![[Smile]](smile.gif)
![[Frown]](frown.gif)
![[Smile]](smile.gif)