|
Author
|
Topic: Elmo St1200HD M: Foot Counter Belt Repair
|
Mathew James
Jedi Master Film Handler

Posts: 740
From: Hamilton, Ontario, Canada
Registered: Dec 2014
|
 posted December 11, 2014 09:07 AM


Hi all,
I am thinking at some point it would be nice to fix the counter on this unit. Will i use it? Not really other that to watch the nice numbers move, but i still would like to fix it eventually.
Has anyone yet done this?, and if so, can you please let me know the exact steps to do this. If you have a scan of a page with instructions, that would be great as well as i do not have the service guide, just whatever i have found so far on the net.
I understand that once the counter assembly is off it is a piece of cake...i found a belt on ebay and will order if i can get some info on how to perform the task at hand...
Thanx in advance!
Matt
--------------------
--
Cheers,
Matt 📽
| IP: Logged
|
|
|
|
|
|
Mathew James
Jedi Master Film Handler

Posts: 740
From: Hamilton, Ontario, Canada
Registered: Dec 2014
|
 posted December 11, 2014 10:25 PM


I am not sure myself what other use there would be other than to make mental notes of how long films are as they are played through....
I am thinking the sprocket underneath would need to be unscrewed first and then somehow that counter assembly could be taken off..but not sure. Whatever i end up trying, if it works i will upload pics to this thread in case others in future may wish to try.
Matt
Edit: Okay, I got bored and wanted to explore this further and although i do not yet have the replacement belt, there was alot of black goo from the previous belt that i wanted to remove anyways before it started to get on the film. This removal seems straightforward. Here is what to do:
1. Before removing screw to sprocket, the guide below needs the screw removed so you can lower the guide enough below the sprocket to get it off. 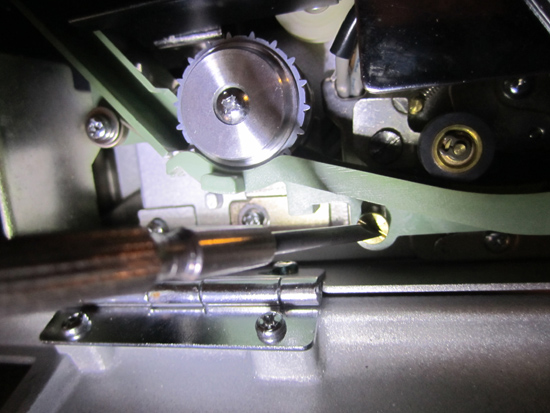
2. Once this screw is off, remove the screw to the sprocket under the counter assembly. Be careful of the order of the following pieces that will come off: 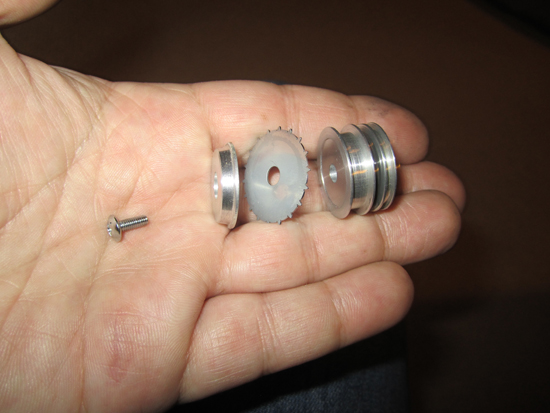
At this point i cleaned the pulley in the middle where all the black goop was. Without a schematic, i now know where the belt goes onto this pulley from previous goopy 'evidence' left ![[Smile]](smile.gif)
3. There is a washer still left on the shaft that i didn't remove. Make sure it goes back on first if you do remove it: 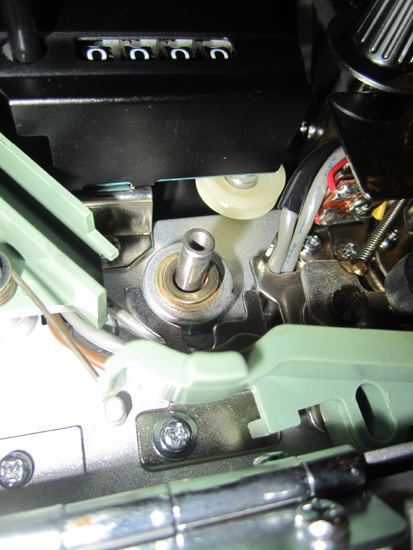
4. This final pic shows a closeup where you can see the white pulley behind the counter assembly where the top of the belt will go...Now that i can see in here, i believe it should be easy to get the belt first onto top pulley,and then put the bottom sprocket back together in reverse of how you took it off, then the belt would pull over this, then the last step would be to replace the screw that holds the guide on. 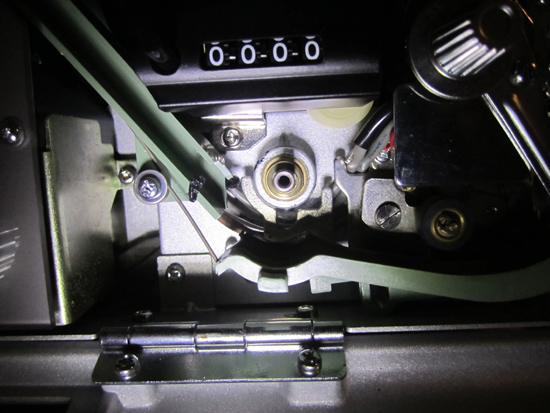
I can't wait to get a belt to try this officially!!
Cheers,
Matt
[ December 12, 2014, 08:59 AM: Message edited by: Mathew James ]
--------------------
--
Cheers,
Matt 📽
| IP: Logged
|
|
|
|
|
|
|
|
|
|
|
|
|
|
|
|
|
|
Mathew James
Jedi Master Film Handler

Posts: 740
From: Hamilton, Ontario, Canada
Registered: Dec 2014
|
 posted December 25, 2014 10:20 AM


Dear All- I just got the belt in the mail! Wow, that is tiny!!!! Big envelope for a 2 inch belt ![[Smile]](smile.gif)
Anyways, Now that I have repaired the belt..I can show how i did it. There may be different ways, and I have no book. I am just showing what i did that worked for me.
For that sprocket, I learned something neat. We were all correct!!!
The trick is that if you imply removed the sprocket assembly and try to put back on, it will seem like the hole is too big for the screw and thus will spin all wonky.
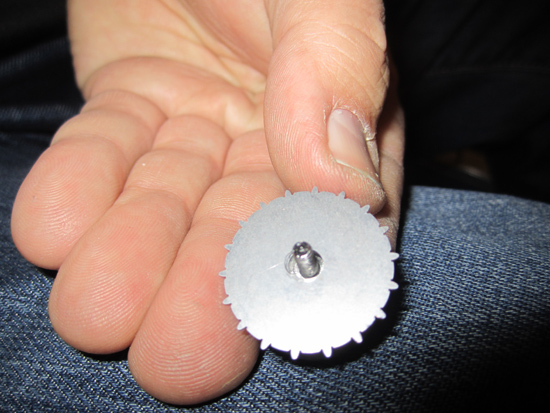
What needs to be done is that after you remove the sprocket and before you re-assemble, one needs to pull on the shaft and it will come forward 1/8" or so. What this does is allows that when you put the sprocket assmbly back on, the sprocket will actually fit onto the shaft perfectly, and then once you tighten the screw, it will pull it back in perfect. Hope that make sense!
So here is how i did the whole job:
1. Removed screw under bottom green film path so it can lower below sprocket.
2. Removed sprocket screw and then assembly, remembering order!
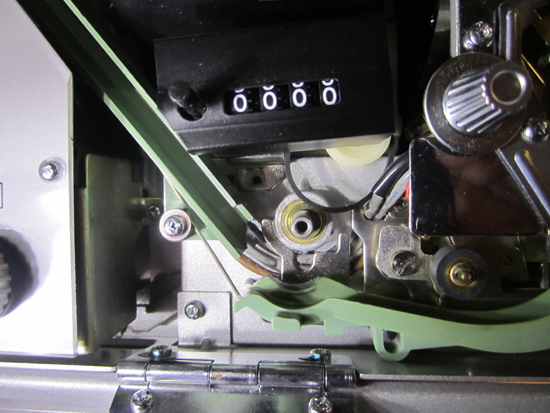
3. Unscrewed bottom screw to counter. It was mentioned that removing this screw you can take off whole assembly, but on my HD model this is not the case. You would need to remove the left green film guide first to do it this way, so I didn't. With the one screw removed, you can tilt the counter up on the right side so to give more room to put belt on topmost pulley:
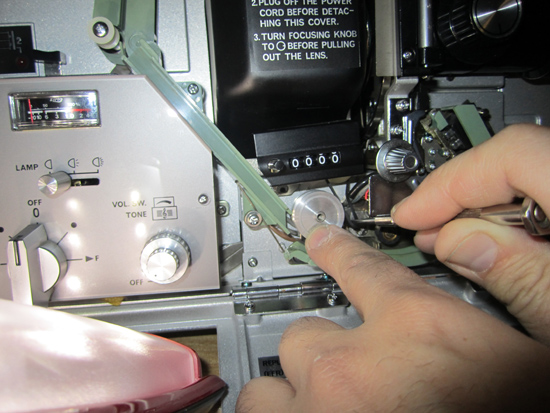
4. Once on top pulley, you need to stretch lower side carefully around the sprocket pulley wheel(Back-most grove #3), trying to keep pulley completely straight so belt is not twisted. This took me a while to figure out how to do without twisting, but it can be done. I used a mini screwdriver set to pull with and to keep straight!)
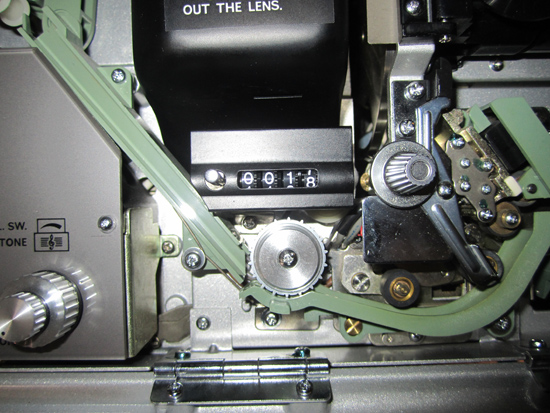
5. Once everything is in place, it is time to put the pieces back together. Make sure to pull out the main shaft a little so the sprocket will it onto the shaft and not spin freely!!!
6. Put screw back onto green film path.
Voila!! I hope this helps. As i say, there may be easier ways ![[Smile]](smile.gif)
--------------------
--
Cheers,
Matt 📽
| IP: Logged
|
|
|
|
|
|
|
|
|
|
|
|
|
|
|
|
|
|
|
|
|
|
|
|
|
|
|


 UBBFriend: Email this page to someone!
 Printer-friendly view of this topic


![[Smile]](smile.gif)


![[Wink]](wink.gif)


