|
Author
|
Topic: Getting an NT1 back up and running
|
Tom Photiou
Film God
Posts: 4837
From: Plymouth U.K
Registered: Dec 2003
|
 posted January 29, 2018 02:06 PM


To start with i must point out this does not refer to the same machine i had on here before, that one is good and is being used to view my films, I also hope as it goes along here and reach the cam tank that it may help canS,
Part 1
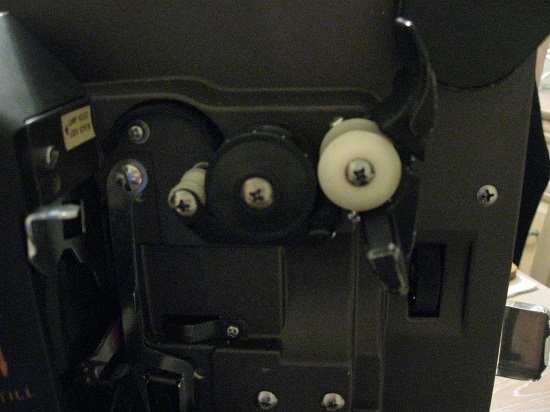
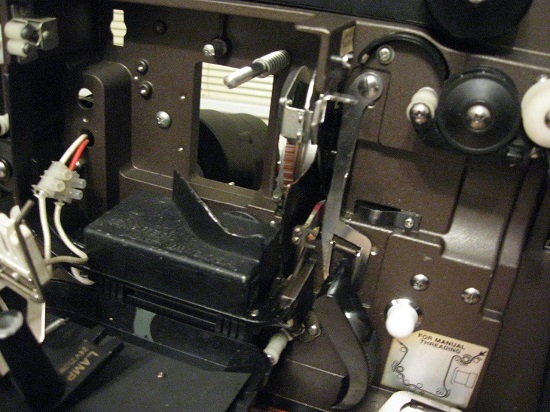
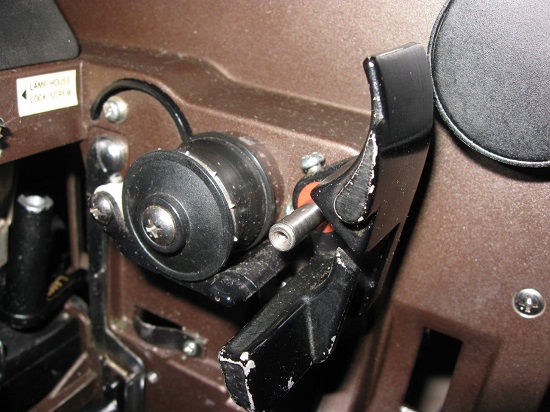
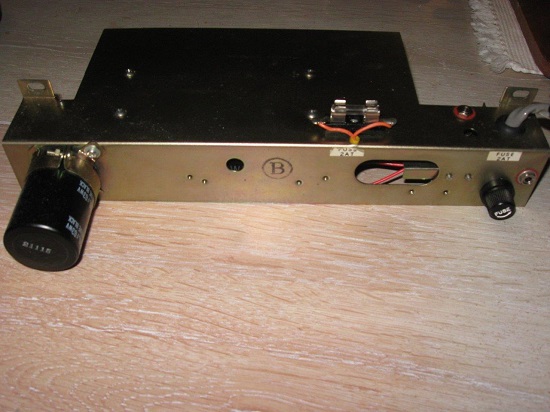
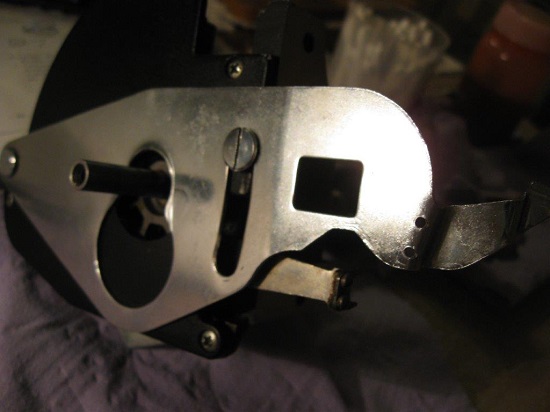
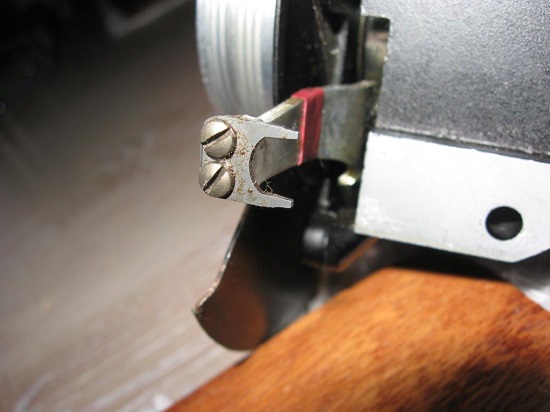
I am going to experiment/play with what was a running Eiki Elf NT1 before parcel force got hold of it. It was purchased as a rough machine but a runner. To start with, the back cover is not good and hand painted, not by me, broken and only contains one speaker on the forward part of the cover which is odd as i thought they all had twin speakers like my main machine so i will be on the hunt for a decent back cover with speakers, The first thing i noticed, (apart from broken bits of plastic in the box), was that the reverse selector lever, (image 1, the front slot where you feed the film), was in the reverse position and if i pushed it back to play position it simply wont stay, it just springs back into the position you see in the image.
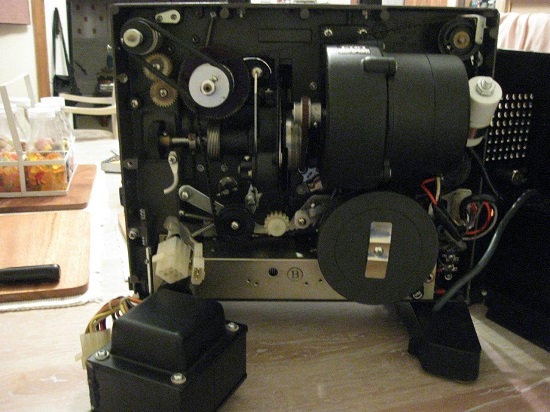
So, i started with the absolute basics and the easiest part, getting the machine stripped to as far as i dare. Please remember here, i am not trying to show how it's done, nor am i showing it in order to gain a smart ass status, this is just me sharing with you all my attempt to bring it back to life while spending absolute minimum.
The lens holder is removed already as i required parts for my main machine; this is simply two screws to remove the assembly.
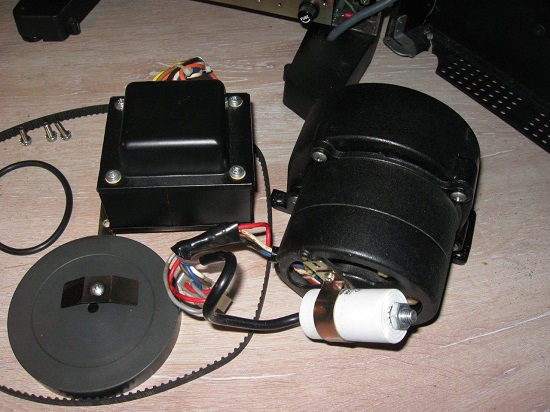
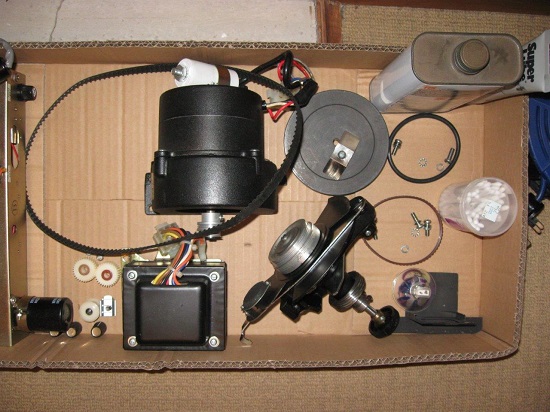
First i disconnected the transformer connectors and removed the three screws holding the unit in, this thing weighs half the weight of the entire machine, followed by the flywheel,
Next, i removed all the belts, you have to move the tensioner in order to get the main drive belt out, this was followed by disconnecting the main motor electrical connectors, removing the three securing screws and taking the motor out. You may notice this motor has the new capacitor, one that i bought previously when my main machine had a fit and blew it throwing muck everywhere so i pinched the motor from this machine to get my main one going with minimal fuss. Hopefully this one will fire up when it's all back together.
Before going further i retracted the claw, if you forget to do this it is easy to strike the claw on the body when removing the cam tank assembly, which will of course result in damaging the claw itself.
Next was the very simple removal of the lamp housing out of the way by simply unscrewing the single knurled nut,
Now all this is out i can get a spotlight in there to see what the rest looks like, from what i can see it isn't too bad.
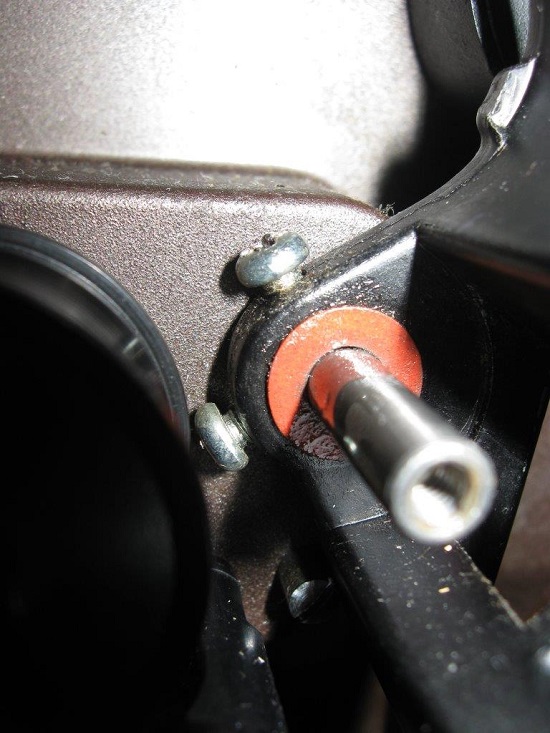
I have a replacement lens holder assembly complete with the pressure pad and focus knob which has the later Red coloured polyurethane sleeve, originally this was a modification by Eiki and this focus sleeve was not available separate but supplied as a part of a new focus knob, the sleeve was moulded from factory to the shaft.
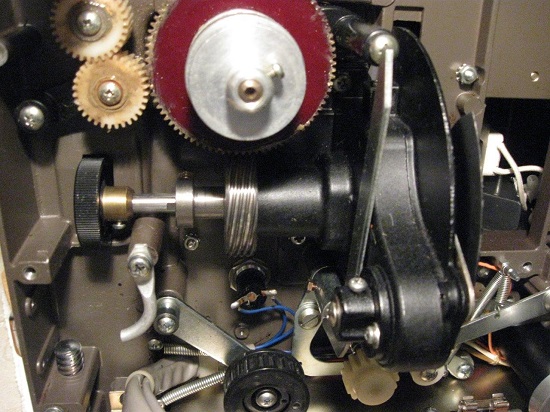
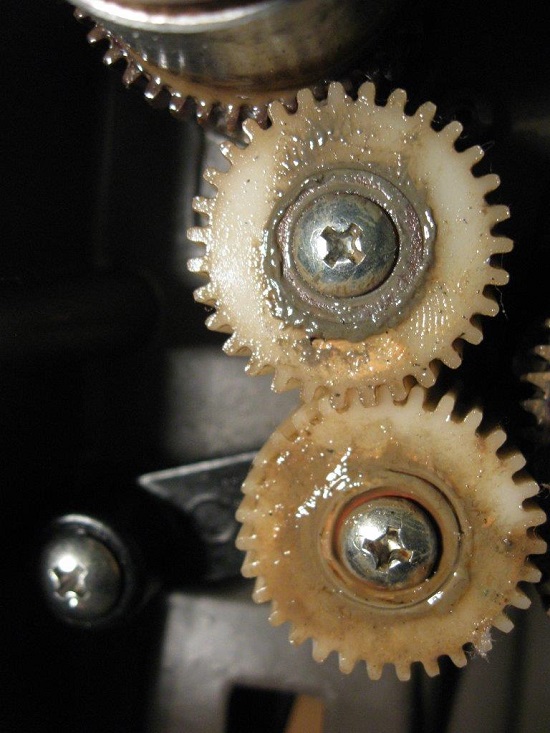
Take a look at the front arm gears please, the gears are way over lubricated, its all over the place, this is how it was when i got it. I am wading through the service manual to check a few other bits.
Any support/tips, will be more than welcome.

As i reached the photo limit on this part i shall be on later with part two,
| IP: Logged
|
|
Tom Photiou
Film God
Posts: 4837
From: Plymouth U.K
Registered: Dec 2003
|
posted January 30, 2018 06:31 AM
2/
Session two,
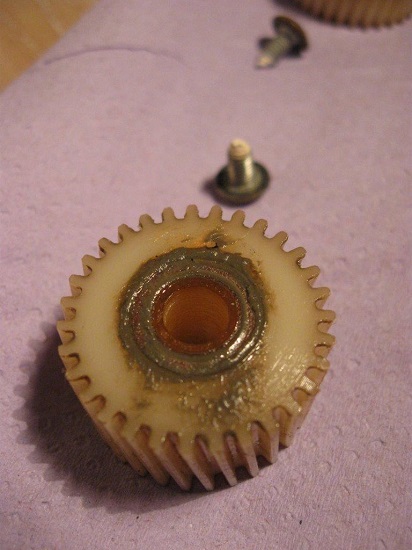
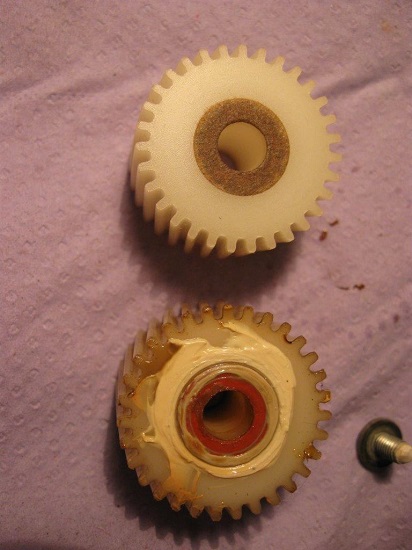
and it looks as though this is more cleaning operation than anything else, The first thing i needed to sort out was the rewind lever not staying in place but this turned out to be nothing more than a very simple case of loosening the two screws which hold the lever in place & moving it backward slightly while it was in the reverse position, it certainly took a knock in the post service, All the rest of that mess will be cleaned after i sort the inside of the machine. I removed the upper and lower gears which are used for the rewind mechanism, these were virtually glued in as you could see in the last images yesterday, all the grease had turned into what looks like PVA glue both on the gears and the shafts. To clean all this up i used a cleaner RS 180-847. An Italian collector who repairs his own Beaulie and GS 1200 recommended this stuff and i have to say it is brilliant BUT, must be used in a ventilated area, it does have the X on the tin and it does stink so went i to the open window, I poured a small amount into an old cup, got the nitrile gloves on, a tooth brush and bathed the gears and it took a few seconds, this cleaner can be viewed here, it takes literally a few seconds to soften the old much to get it off.
https://uk.rs-online.com/web/p/precision...031383038343726
Also using cotton buds i had no alternative but to clean off the other visible gears in the machine, (front end at present), and wipe off and allow to dry. All in all the machine appears quite clean and with a few items being sought hopefully will run fine again at the end of all this,
Not as many people looking in here as i thought might but lets see how it goes.
The only reason for me not removing the mechanism all together is after reading the service book it is clear that this will cause more problems than it solves. This is where the experts come in, and i do not have the ability to make the fine measurements of adjustment shown in the service book.
If this machine was too severely damaged or covered in mould and rust then i would take everything apart but the intention here to attempt to experiment with a hope it may run once again
| IP: Logged
|
|
|
|
Tom Photiou
Film God
Posts: 4837
From: Plymouth U.K
Registered: Dec 2003
|
posted January 30, 2018 12:01 PM
3/
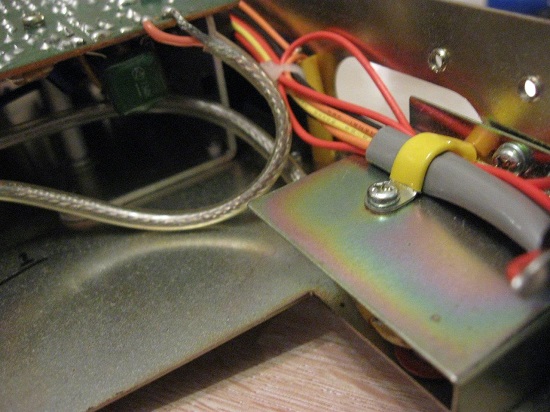
i continue with what has turned into a clean up and re lube session before moving onto the cam tank next. To get right into the machine i removed the amplifier which on these models has to be one of the easiest ever, all you need to do is take off the volume, bass and treble knobs from the front, remove the flywheel, (already done on day one), unplug the MT 9 pin plug and the solar sound lead. Then it's simply undo the two screws each end of the amplifier and slide it gently out. I was expecting this to be covered in either mould, dirt or a mix of the two but as you can see it is actually very clean, just some surface dirt which is to be expected.
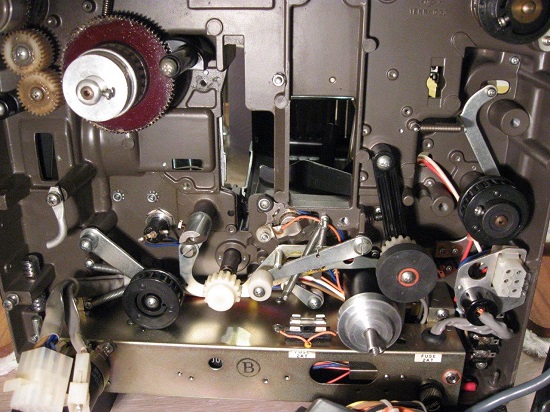
Next up was to examine all the visible linkages for the auto thread from front to back and the gears and rollers i could sort without any further removal. Everything seems to be free but sluggish so i started on the reverse take up clutch cam, simply unscrewed it was soon clear that the old grease was the problem again so i took it out & cleaned everything up, (watching out for the three fibre washers), and then re lubed lightly and put it back together along with some of the other toothed gear wheels. I will leave the take up arm gearing until later. I will need to check whats in there and how critical the adjustments are before pulling it apart. Next i used my cleaning fluid to get into the moving parts of the linkages so i could replace the gooey grease with new. So, evening three clean up is job done, it may not look much but i was on it for two hours again so slowly, bit by bit i am getting the works cleaned up and re oiled/greased as best i can. Its messy!!!
Next I continue with the cam tank, BUT, i will only remove a few items for cleaning out and re oiling and greasing, if you take a look at the pages i have put up here from the service book regarding the tank you will all fully agree that totally dismantling this by anyone other than a qualified engineer is a no no for the likes of me. Setting it up will require the skills and experience that i for one do not have as well as any tools.
I have serviced my own cam tank and its fine but jeepers i had fun setting it up, (after some phone calls to Bill back last year), i think i removed it three times and also the lens holder and pressure pad and its springs at least 6 times to get it right. Lots of time and lots of patients is required.
Your feedback, tips, and/or criticism will be very welcome as always.
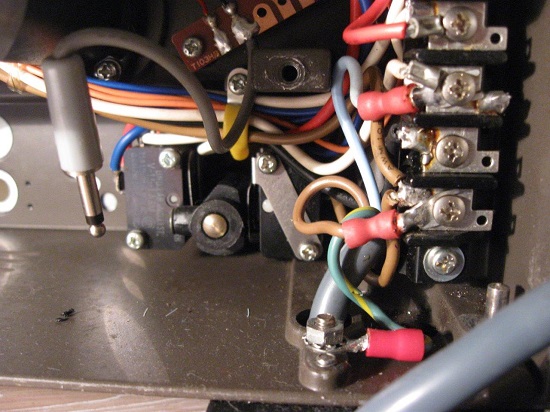
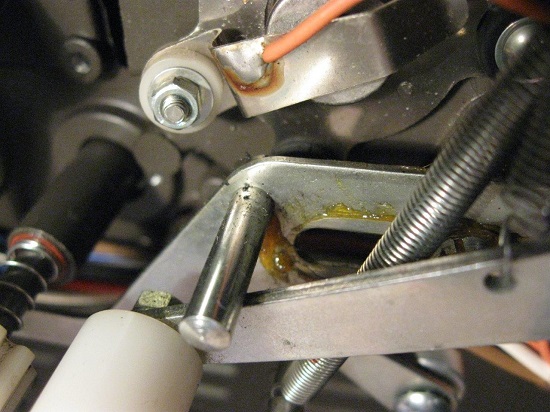
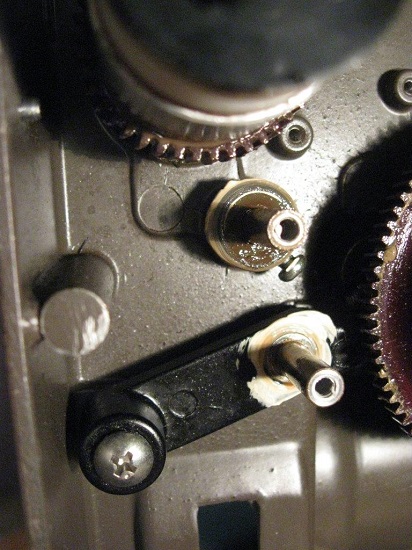
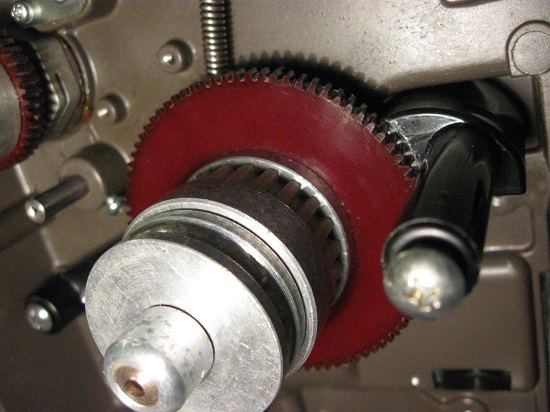
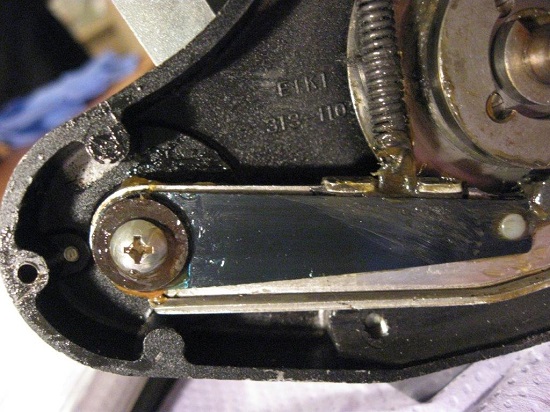
The 6th image here shows the old gooy grease in th part of the linkage which needs to be remove and re-lubed,
| IP: Logged
|
|
Tom Photiou
Film God
Posts: 4837
From: Plymouth U.K
Registered: Dec 2003
|
posted January 30, 2018 03:44 PM
4/
Cam Tank service, (semi service).
Let me say here and now, (as before), the cam tank should only be fully dismantled by a qualified engineer, without the correct test films and tools for setting this up it could turn into a disaster which could end up damaging films, if you could get it to run properly at all, I have already gone this far once before with my main machine so I am happy to do it again, i was savvy enough to ring Bill when i had got as far as i was comfortable with and he kindly advised me that this was as far as anyone need go for basic servicing.
This particular machine has the still picture capability so makes getting in just a little trickier.
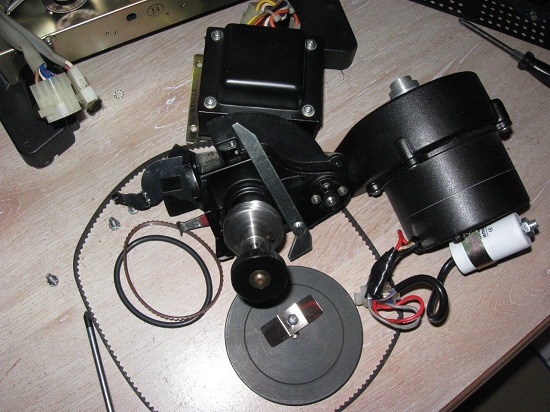
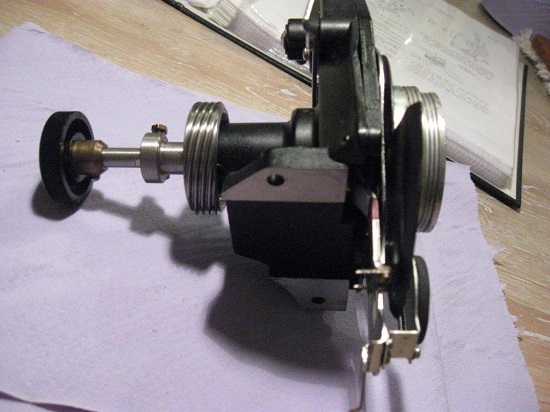
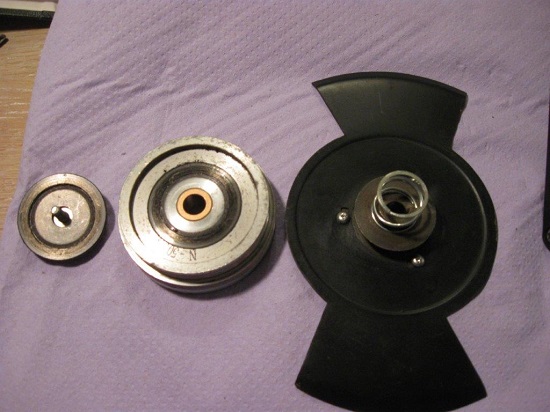
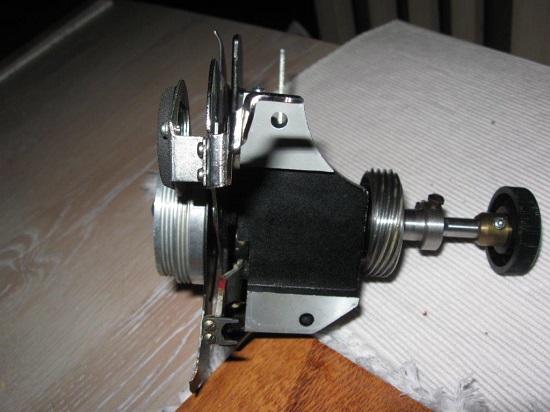
As you will see image 1 shows the Cam tank assembly removed,
Before anything is removed the lever needs to be in Still image position, in this position the pulley rotates freely,
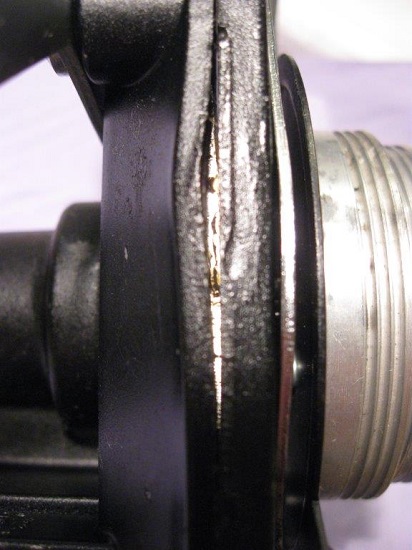
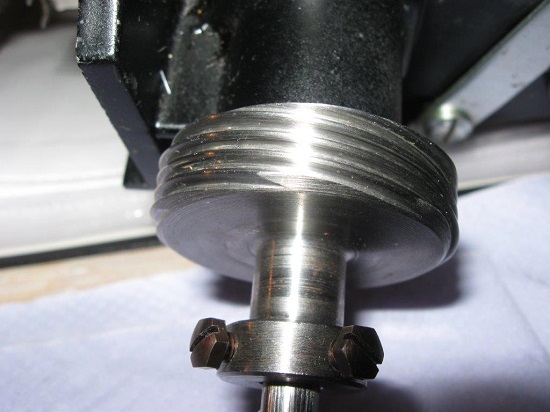
Image two here shows something i didn't expect, part of the body appears to have a dent so you can see inside, God knows what the hell happened to this one,
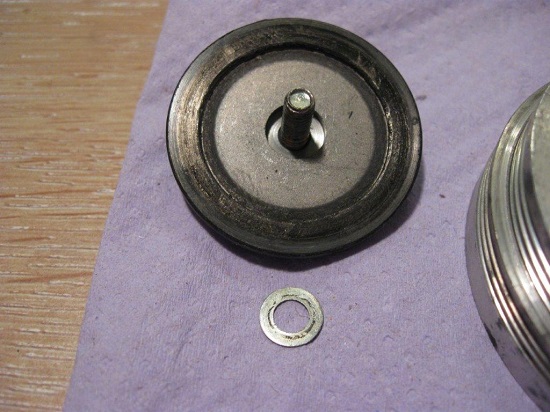
Once you undo the end screw and remove the outer cap you need to gently hold onto the shutter blade while slowly raising the still image lever, this releases the tension spring allowing you to take off the shutter blade with the hub.
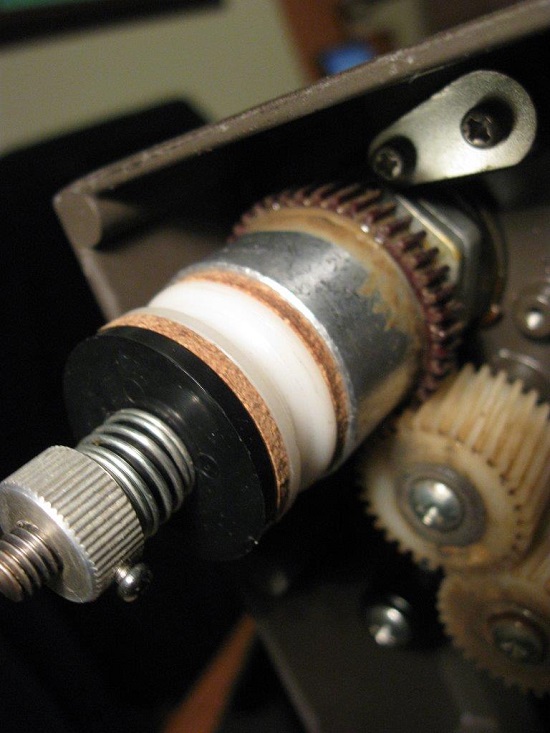
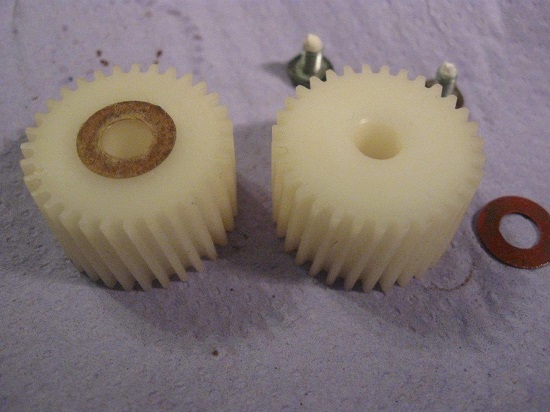
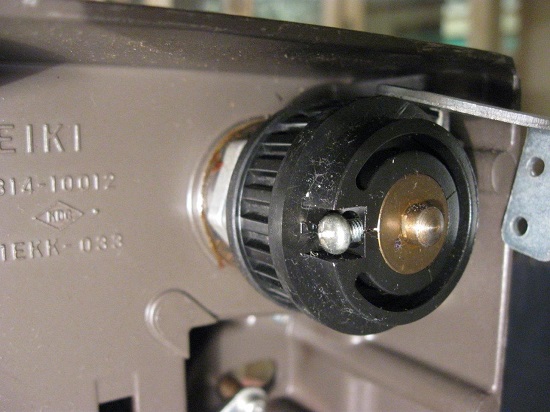
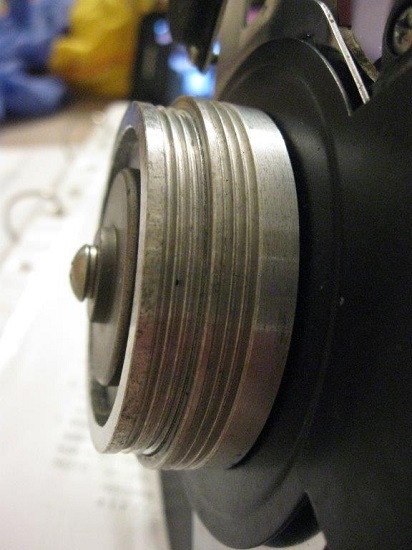
you see that washer on image 4? That is vital if its fitted as this one provides the correct clearance between the shutter pulley and the shutter blade and hub.
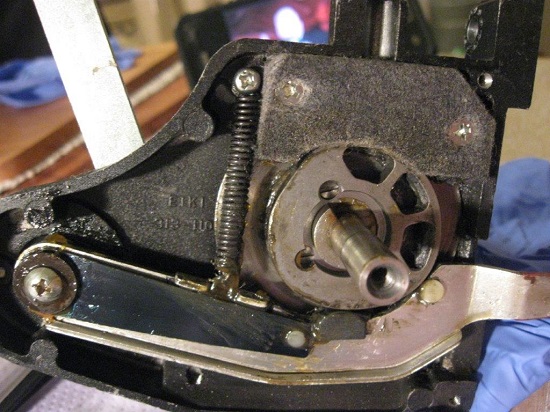
With the shutter and hub removed, the end plate is held on with three screws, these are removed to expose the cam and claw housing, and the oil holder which as you can see is a little dry so this will be removed, i will clean out what i can of the old grease and oil and re do it all using my Elmo red projector oil and the synthetic grease that was recommended and used by Mr Pratchett. (Thank you for this if your reading ![[Wink]](wink.gif) ) )
I will have to continue on the next section due to the limitations of uploading images on her ![[Mad]](mad.gif)
| IP: Logged
|
|
Tom Photiou
Film God
Posts: 4837
From: Plymouth U.K
Registered: Dec 2003
|
posted January 31, 2018 02:09 PM
Images 1 and 2 shows the cam tank back together again, re oiled and greased, image 3 shows the main worm gear which as you can see has had a toothbrush to get in there and cleaned it back to a nice shine, this will obviously be lubed up when i fit the assembly back into the projector.
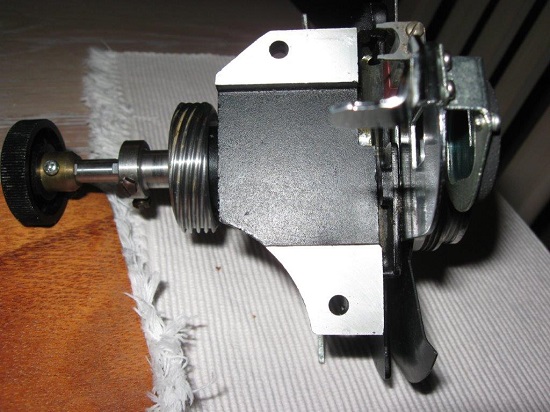
An image 4 and 5 simply shows everything back together again. For now i dont think that slight damage to the lower body will cause any problems. Image 6 is the last part to clean, the claw, Aint no way i am removing that, I've seen the measurements & what you need to do to set it up properly.
Image 7, there it is all back together,
I hope so far anyone looking in here is enjoying this as much as i am doing the job, not many responses, was hoping for any opinions or any criticism or tips from the long term 16 users

| IP: Logged
|
|
|
|
|
|
|
|
|
|
|
|
|
|
|
|
|


 UBBFriend: Email this page to someone!


 Printer-friendly view of this topic