Announcement

Collapse
No announcement yet.

Hawkeye-DSLR

Collapse
X
 
  • Filter
  • Time
  • Show
Clear All
new posts

  • #91

    Hello all,
    Glad you got back bruce.

    Stan, your idea for a 20-tooth pulley is very interesting.
    Your approach is the one I use for the design.
    If I understood correctly, the current small motor of the capstan would be replaced by a stepper motor?
    is there enough space?
    will have to modify V12?
    why The choice of 20 teeth? Is it a calculation based on the synchro of the stepper motor and the sensor?

    is it possible to have more precision on the notches than I can design them for the sensor
    (I can't see where you want them, Stan).

    I will try this

    a 3D printer will become essential to you, Stan!

    I was late, I had promised to print personalized small boats for my grandchildren (I spent the weekend designing for them). A promise is a promise.

    BTW :
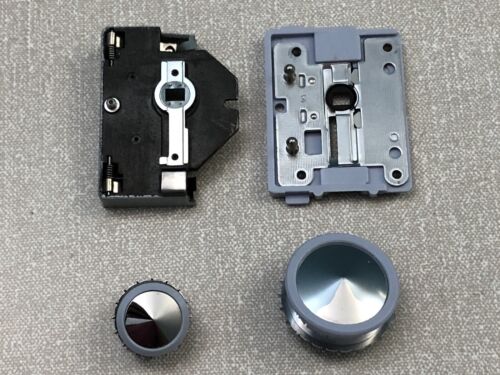
    i am trying to print the new parts for the hawkeye slider. And I change as I go.
    I will post my progress (a little late, and my hawkeye is dismantled).
    For the tests, a second unit would not be a luxury (I am thinking about the cheaper mersoco brand scanners) or Ebay.
    https://www.amazon.fr/Scanner-PELLIC...mputers&sr=1-4
    Last edited by Kamel Ikhlef; May 04, 2021, 04:37 AM.

    Comment


    • #92
      The grandchildren are a definite priority Kamel.
      Thanks for your offer. I have done some work already. You can check it here:
      https://github.com/vintagefilmography/homemade-telecine
      It is designed for a homemade unit so there are space restrictions.
      Maybe you can think of a gate design. A design that would not scratch the film.
      I plan to use this one for now:

      Possibly add rubber rollers if this idea works.

      Comment


      • #93
        Thanks for the tip, switching the motor sync line. Which one is that? I switched the black lead, the other 3 are red.

        Black is not the one, motor becomes a vibrator! Can't find any answers online when others ask the same question.

        Comment


        • #94
          Sorry David, somehow missed your second last post. For triggered video the capstan transport may be OK but still needs to be tested. For freewheeling video it may work also but the MSP would have to be run from a crystal. Have that on my list.
          Are you trying to reverse the motor direction? Swapping one phase polarity should work.


          Use an ohmmeter to test the phases.
          I bring the Forward/Reverse line out but it is not easily accessible. Would have to cut pin17 trace and jam a pinhead to short out pin 17 to pin 16 on teh fine pitch 20 pin connector.

          Comment


          • #95
            Here is the updated version of capstan.
            Click image for larger version

Name:	capstan2.jpg
Views:	209
Size:	46.7 KB
ID:	33713

            The design files are located here:
            https://github.com/vintagefilmography/homemade-telecine

            Comment


            • #96
              I will need to read thru that motor information a few times!

              I thought you were saying in post #89 you had placed a switch on your motor.

              The FW in these machines checks for the image change and detect the stuck film that way. I have a switch in the frame sync line. With the line disconnected the stepper will run continuously. Essentially the machine is in a waiting mode for sync. When done I flip the switch and the stepper stops.


              That would be more convienient than turning off the powerstrip! But it's not worth any complicated solution.

              Using the stock equipment was appealing with the transport switches in place.

              Now there are difficulties. The 3:20 maximum runtime and the random sync. Maybe it's the rolling shutter? That usually shows with horizontal motion. As the sync fails the frames appear to rise up. I even set the shutter to 1/250s. That only minimises the streaking, but it is still there. Just seems odd.

              I did one capture tonight at standard video 30fps. Then I began to extract the 2 frames every second from 15,000 captured. I got 30 good frames done in an hour. That would get faster of course, but that process needs to be automated.

              Capturing video at 2fps in real time was sharp on every frame and easy to see live on the camera. When sync failed it was also easy to see. Choosing that method would mean stopping, rewinding, and restarting every time the sync failed. Then just edit the clips together.

              It's getting less appealing! Single frame capture is sounding better all the time.

              I let the dogs out, then printed your capstan. It was a draft print but the teeth don't look bad. They need to be cleaned up before film could be fitted on it. I will just reprint!

              Long ago and far away from Hawkeye v12, I tried to mount a limit switch on the take up reel. It never happened and I still have the switches.

              I could be wrong thinking they don't get any smaller than mine,but it is too big for the switching teeth.

              That part might need to be twice the diameter. The roller on my switch fits between the film sprocket teeth though they don't offer a lot of movement. Maybe the switch could be mounted on the bottom of the capstan and not interfere with the film. Just 1 row of teeth to rule them all?
              Click image for larger version

Name:	capstan.jpg
Views:	248
Size:	186.4 KB
ID:	33717
              Remembering all the problems I had with my capstan teeth, maybe a smooth one would work here too. Best if there were two wheels, one with spring tension to prevent the film from slipping. I found a source for the rubber bands to fit on a smooth capstan. < $10 and I have only used one. 199 still in a bag!

              Comment


              • #97
                Sorry David, I misunderstood you motor question.
                Here is the sync pin on the Hawkeye. You can use it to figure out the sync wire.
                Click image for larger version

Name:	sync-pin.jpg
Views:	246
Size:	168.0 KB
ID:	33773

                I will retry the video capture again and see how long it can keep the sync.

                Use small icons (or medium icons) and align the columns (15 columns) then select the good images by selecting the good column with a mouse drag. Copy the selected images to a destination folder. There, you select all and use the rename button and it will rename the images sequentially.

                I also wrote a script for it. Check the following repo:
                https://github.com/vintagefilmography/DSLR

                I was pleasantly surprised when I opened up the forum and saw your picture of the capstan part. That is very cool.
                I actually wanted to use the optical detector. Have 5 of those here. Can drop one of them in an envelope and send it yo you.

                I might have an older Hawkeye board and can send it to you so you can try your captures at different speed.
                Good work.


                Comment


                • #98
                  Stan, your toothed pulley is very complicated to print.

                  I tried to get a good finish on the teeth and the notches.
                  I think the best is to split the model into 2 parts to get it with great precision.
                  because of the two floors, we cannot put supports that would damage the part too much.

                  See example below:

                  For the Frame film guide, I have no idea for the moment but I am thinking about it.
                  Attached Files

                  Comment


                  • #99
                    Stan & Kamel

                    Stan, I reprinted the capstan with hi-res printer settings. I am surprised that the teeth printed very clean. I never had a successful print long ago when we began this capstan idea. I'm now using PETG based filament and was not before.

                    S8 film fits on the teeth, but very tightly. I need to check your design dimensions against my printed dimensions to see if I need to calibrate. Could you could save an STP/STEP file? STLs usually import out of scale. It's likely off by a factor of 10. The STL measures around 10" diameter.

                    That said, Kamel is on the case! Kamel I believe your sailboats must be in the water now. I also thought of using multiple parts and I'd include some flanges to keep the film in place.

                    like this @ https://www.thingiverse.com/thing:2375925
                    Click image for larger version  Name:	spool.jpg Views:	0 Size:	25.1 KB ID:	33880

                    Comment


                    • David, For the moment the sailboats are in port. Not yet printed (just designed).
                      More than 30 hours of printing in 0.2 layer (I have 2 to do and paint after) ..
                      And it does not pass on my 2nd printer.
                      My grandchildren will learn patience (and frustration) ....

                      Stan, for the capstan teeth, why this choice of 20 teeth?

                      BTW: As I am going to reassemble my hawkeye V12, I will be reworking the capstan (improve the teeth, maybe change the size of the pulley). can we replace the small motor with a stepper? nema type).
                      sorry, I am in the wrong forum (wolverine / DSLR).

                      Comment


                      • Kamel, the 20 teeth is to have more teeth engaged in case there are broken perforations. It does not have to be that large if there is a separate rubber pulley system to pull the film. In that case the toothed pulley woul be used as an idler for frame synch.
                        BUt for now, I intended to use this pulley with the stepper to pull the film out. Plan to use the following stepper.
                        https://www.amazon.com/gp/product/B00PNEQKC0/
                        David, will try exporting the step file. I included the SperkDesign file in the repo in case I have issues with export.

                        Comment


                        • Ran the Mark2 camera with the custom MagicLantern build. Ran at 6 FPS and the video goes out of sync after 900 frames. This requires a bit of work but it is manageable. Possibly increase to 10 FPS for longer clips.
                          The video capture is in RAW format allowing for pretty extensive post. I just adjusted the white balance.
                          Nice and sharp video. Will post it later today.

                          Comment


                          • Here is the setup.

                            Click image for larger version

Name:	mark2-setup.jpg
Views:	220
Size:	91.2 KB
ID:	33971
                            Click image for larger version

Name:	mark2-top-view.jpg
Views:	223
Size:	151.5 KB
ID:	33972
                            Here is a sample video.
                            https://drive.google.com/file/d/1o2w...ew?usp=sharing


                            Comment


                            • One nice thing about Magic Lantern is the raw video capture in 10,12, or 14 bit. The file format is Magic Lantern Video MLV, and the editor is the MLV app. It allows you to adjust the exposure, contrast, shadows and highlights and can easily create similar to HDR video.
                              Here are a few pictures of the process.
                              The first one is the original.
                              The second is white balance by using a picker
                              The third is the exposure and contrast.
                              The forth is the shadow adjust and sharpening. You can flip between the images and observe the control changes on the right.
                              Original
                              Click image for larger version

Name:	1.png
Views:	364
Size:	1.00 MB
ID:	34226


                              White Balance
                              Click image for larger version

Name:	2.png
Views:	193
Size:	1,012.1 KB
ID:	34227

                              Exposure and Contrast
                              Click image for larger version

Name:	3.png
Views:	195
Size:	1,017.6 KB
ID:	34228

                              Sharpening and shadow adjust
                              Click image for larger version

Name:	4.png
Views:	186
Size:	1.00 MB
ID:	34229
                              Attached Files

                              Comment


                              • Wow, that is fantastic. I have camera envy!

                                I looked up the MLV app. It can even save the changes as video. This is great news for Cannon owners. It would be so nice to have the video option and not deal with frames.

                                I read thru the manual and found the batch file for pulling every 15th frame. It worked great for me. I had 7100 frames in my double capture. It only took a few seconds to get rid of the duplicates.

                                I'm going to try the 30fps capture next chance I have.

                                Comment

                                Working...
                                X